

Cutting Smooth Curves with Scissors
See how both hands guide scissors around a curve, then practice the movement on a line that starts at the paper edge.
By BeenEast Editorial · Published · Reviewed
Give each hand a job
To cut a smooth curve, open and close the scissors in small advances while the supporting hand turns the paper toward the cutting point. Keep the next short section of the curve visible. Turning the sheet changes the direction of the cut without asking the scissor hand to swing all the way around the shape.
The supporting hand is the hand holding the paper. In these photographs it appears on the left, with the scissors on the right. The first two views come from a demonstration on a stapled paper stack with drawn guide lines. The red-sheet sequence that follows is a separate freehand demonstration. The exact paper weights and layer counts were not recorded.
Support the scissors by their handle loops so the thumb can move one handle against the fingers supporting the other. Before touching the paper, try a few small opening and closing movements. You need enough control to reopen the blades without shifting the whole grip. The long handles in this photograph allow the remaining fingers to curl around them; a different handle shape may need a different finger arrangement.
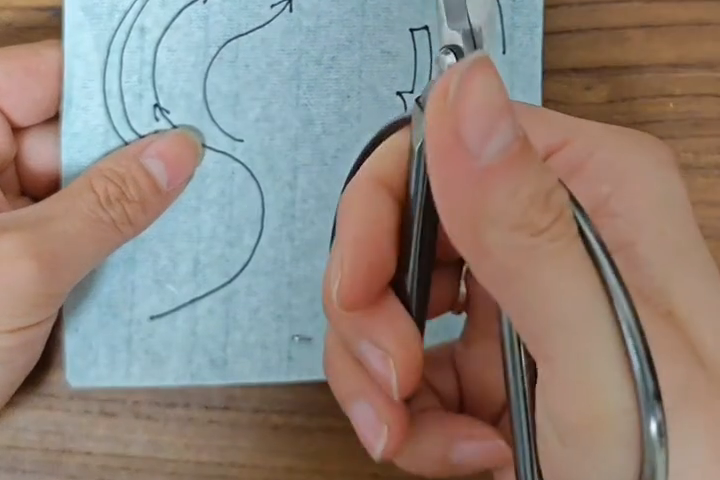
The supporting thumb rests on the uncut area beside the curve, with fingers behind the paper. That gives the hand a place to hold and turn the sheet. Keep fingers clear of the blades and leave the cutting point visible. If the thumb hides the next part of the line, pause and move the grip to another uncut area before continuing.
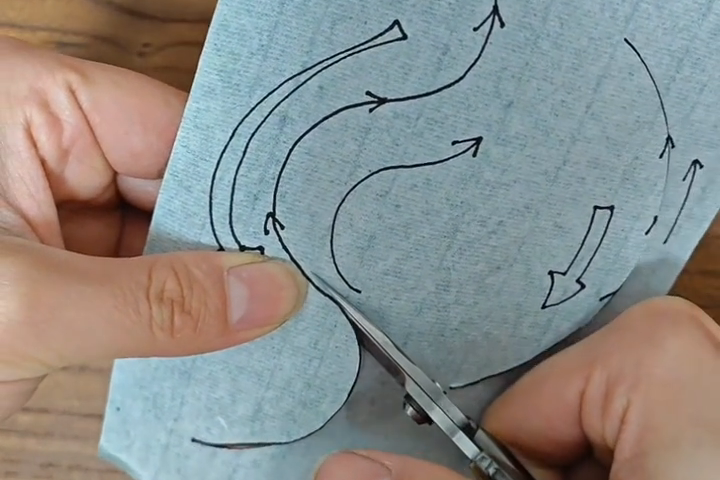
At a 2018 campus demonstration in Shanghai, Shi Ping, a recognized bearer of Hongkou’s Jiangnan folk paper-cutting tradition, taught students to turn the paper while keeping the scissors fairly steady. The scissors still open, close, and make small adjustments as the paper turns.
Sources: Shanghai University of Political Science and Law: Shi Ping’s paper-cutting demonstration (2018)
Follow the paper through a turn
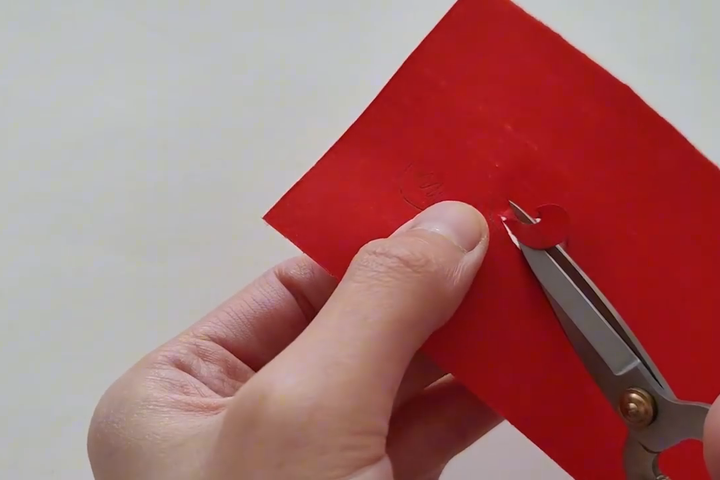
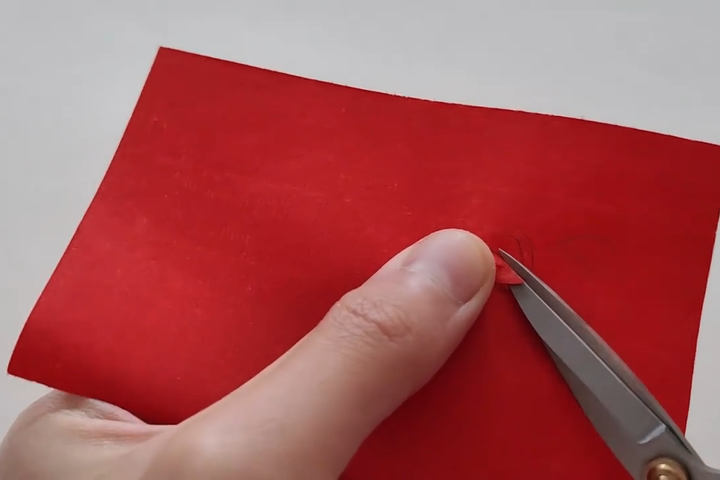
The next three photographs follow the same red sheet and the same curved cut in order. A small internal cut has already begun when this sequence starts. Use the straight edges and corners of the sheet as landmarks: their changing position makes the turn easier to see than watching the blade tip alone.
1. Locate the cutting point
In the first view, the upper edge is nearly level. The thumb supports the paper beside a small round cut, and the blade tips meet the edge of that cut. The useful reference is the point where metal meets paper, not the far end of the handle.
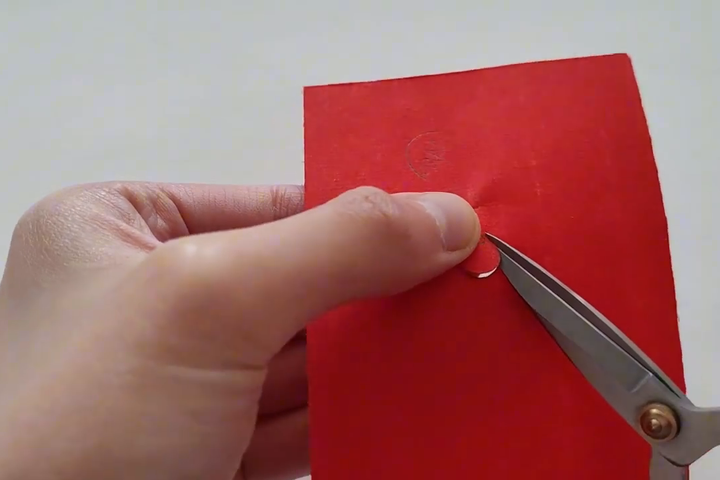
2. Turn the next section toward the blades
The supporting hand turns the sheet, bringing its upper edge onto a diagonal. The scissors still approach from the lower right. As the handles reopen and close, the paper presents a new, short section of the curve to the blades. The small round flap is now easier to see because the thumb has moved away from it.
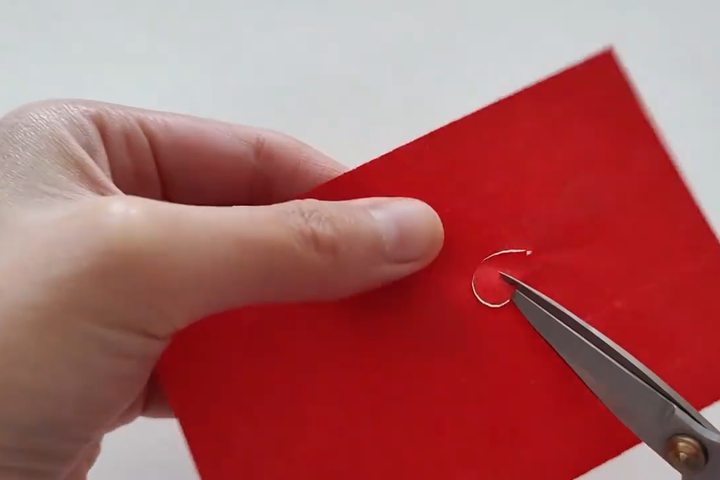
3. Continue around the bend
By the third view, a corner of the sheet points upward. The paper has continued to turn as the cut grows around the small flap. Compare that large change in paper orientation with the smaller change in the blades’ direction. The partly lifted scrap remains attached here; this is an intermediate stage.
For fine curves, short advances give the supporting hand repeated opportunities to present the next section. In a 2023 Beijing teaching report, Liu Xiaodi, a nationally recognized bearer of paper cutting, describes turning the paper while making small cuts with the third of the blades closest to the tips. The advice applies to that fine-detail technique. The size of each cut can vary with the scissors and paper.
Sources: Beijing Municipal Bureau of Culture and Tourism: Liu Xiaodi on cutting curves (2023)
See how the opening is completed
A curved slit and a cleared opening are different stages. After the three views above, the demonstrator cuts along the second side of the shape. This joins the earlier cut and releases the paper between the two boundaries. The photograph below shows that later pass; it is not another view of the first curved edge.
Once the loose paper is taken out, the pale background shows through a comma-shaped opening. Its broad end turns around a rounded head; its tail narrows to a point. The rounded part is useful for studying a continuous bend, while the pointed tail is an intentional change in shape. They should not be judged as if the whole opening were a circle.
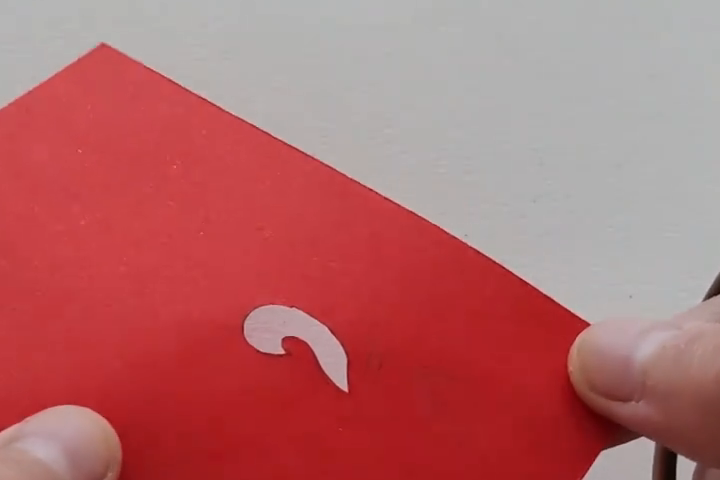
Trace the broad arc with your eyes at the size shown. It changes direction gradually rather than forming a series of long straight sides. A still photograph cannot tell you the pressure used or prove why an edge has a bump. Here it shows the finished shape after the hand movements, without providing a controlled comparison of tools, paper, or cutting speed.
Practice from an outside edge
For this practice cut, use one sheet of lightweight craft paper and scissors you can open and close comfortably. Draw a broad curve from point A on the left edge of the sheet. Bow the curve toward the middle and end it at B inside the sheet. Leave a clear area beside the line for the hand holding the paper.
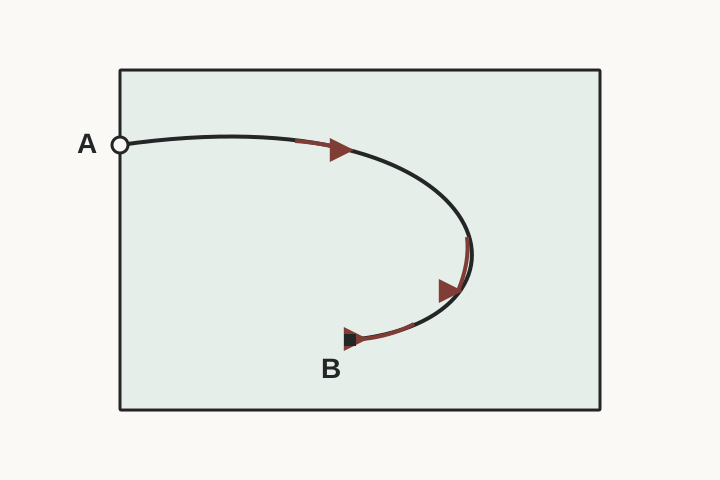
Start at A, where the line meets the edge. After a short cut, open the blades enough to advance and turn the paper until the next short part of the line sits between them. If your thumb blocks the line, pause and grip a clear, uncut area away from the blades. Find the end of the cut before you resume, and stop at B. You should be able to follow the cut all the way from the edge to that point.
Afterward, compare the cut edge with the drawn curve. If you see a sudden corner in a part meant to be round, return to that location: was the next section visible, and did the paper turn before the next advance? If a folded or layered sample shifts, return to a single sheet for this coordination exercise. Change one thing at a time when repeating it. These checks help identify what to observe; an uneven edge alone does not establish its cause.
The first useful result is a broad cut you can follow from beginning to end, together with a clear sense of when the paper turned. The small red opening shows how the same division of work can continue around a much tighter shape: one hand works the blades while the other keeps bringing the next part of the paper into reach.
References
Shanghai University of Political Science and Law: Shi Ping’s paper-cutting demonstration (2018)
Beijing Municipal Bureau of Culture and Tourism: Liu Xiaodi on cutting curves (2023)