

Cut a Folded Paper Leaf
Shape a leaf around one fold, cut vein-shaped openings, and keep the stem and outer edge connected.
By BeenEast Editorial · Published · Reviewed
Fold the paper and shape the leaf
A folded paper leaf starts with half an outline cut through two layers. The fold makes the two sides match. Cut a long central opening along the fold, then add narrow diagonal openings from its edge to form branches. Keep the paper at the stem junction, tip, and outside edge connected. Here you will make a single leaf with a stem, a toothed edge, and vein-shaped openings.
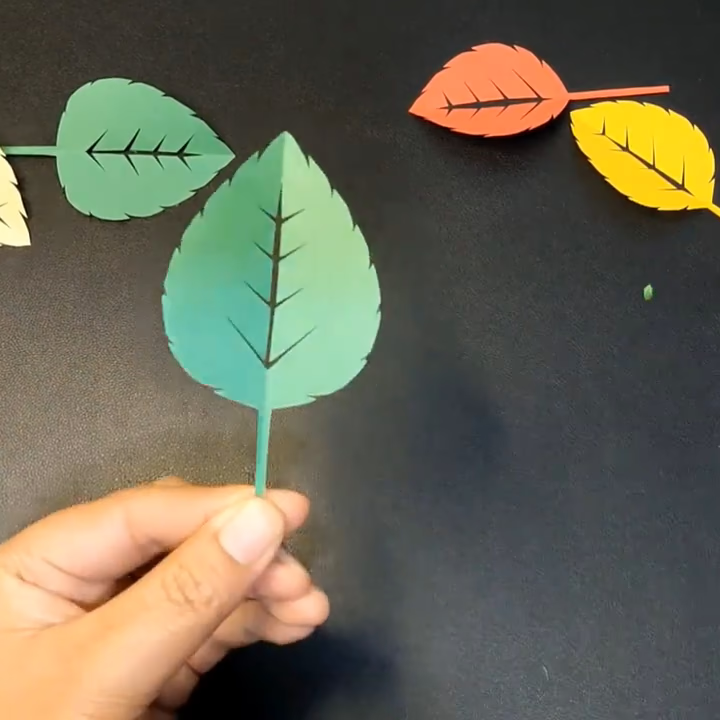
Use a rectangle of thin craft paper and scissors that cut two folded layers cleanly. A pencil is optional. Start with enough room for broad curves and clearly separated notches; very small leaves leave little space to correct a cut. The photographs follow one green leaf made from one folded sheet. The source does not record its dimensions or paper weight.
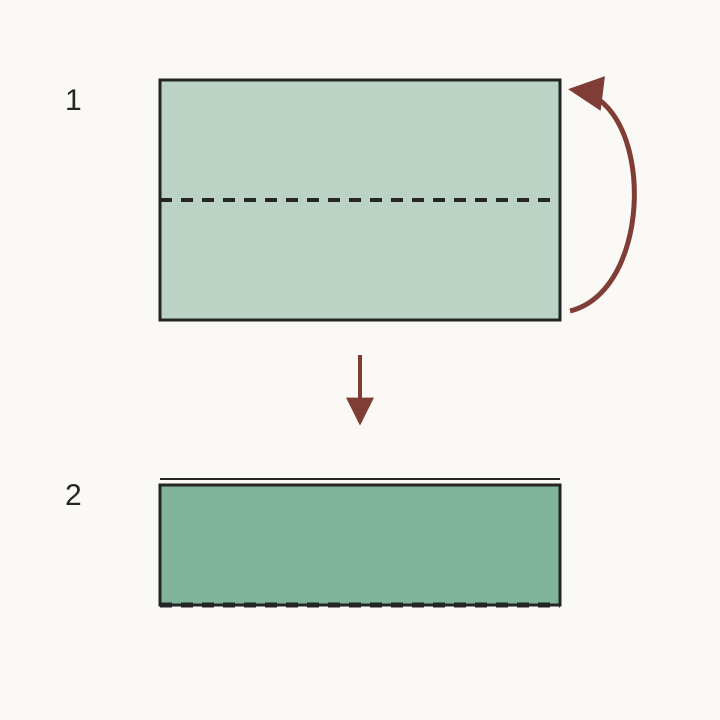
Lay the rectangle horizontally. Bring the lower long edge up to meet the upper long edge. Line up the corners and press the crease. The bottom edge is now a closed fold, and the two top edges can separate.
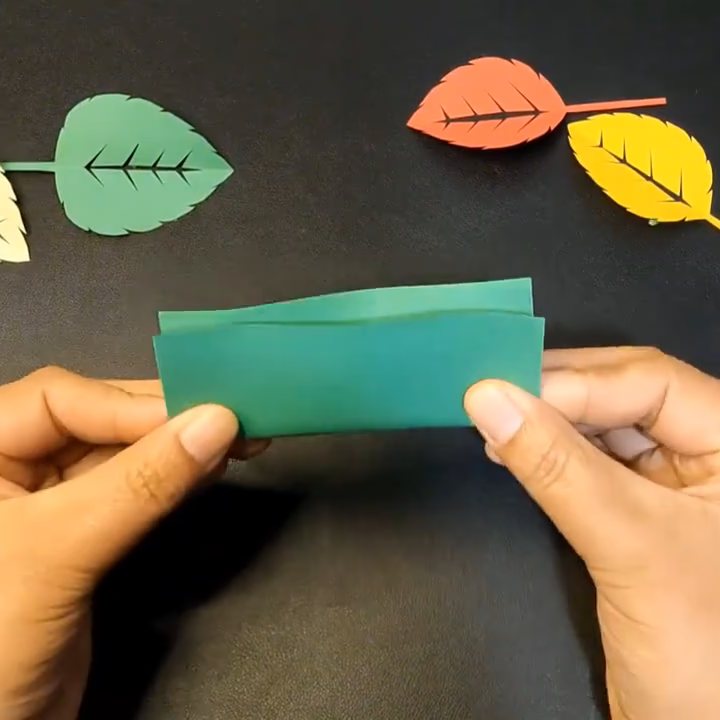
Turn the folded rectangle a quarter turn on the table so its closed edge is on the right. The tip will be at the top and the stem at the bottom. If drawing first, sketch a half-leaf that bulges to the left and comes back to the fold at the tip. Its rounded base should meet a narrow stem beside the fold. Leave the stem joined to the leaf.
Enter from the lower end of the rectangle beside the fold, leaving the stem on the fold side of the cut. Stop the straight cut where the stem will meet the leaf. Keep your fingers clear of the blades.
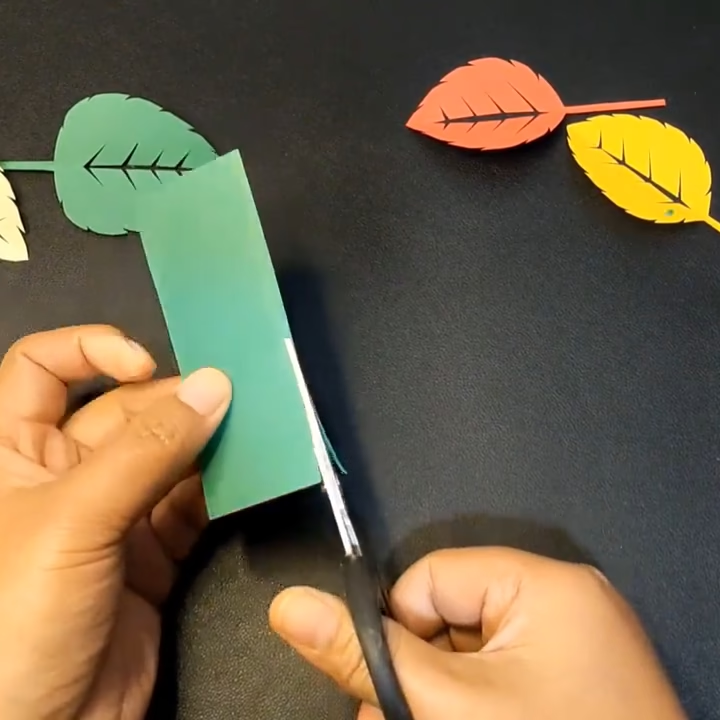
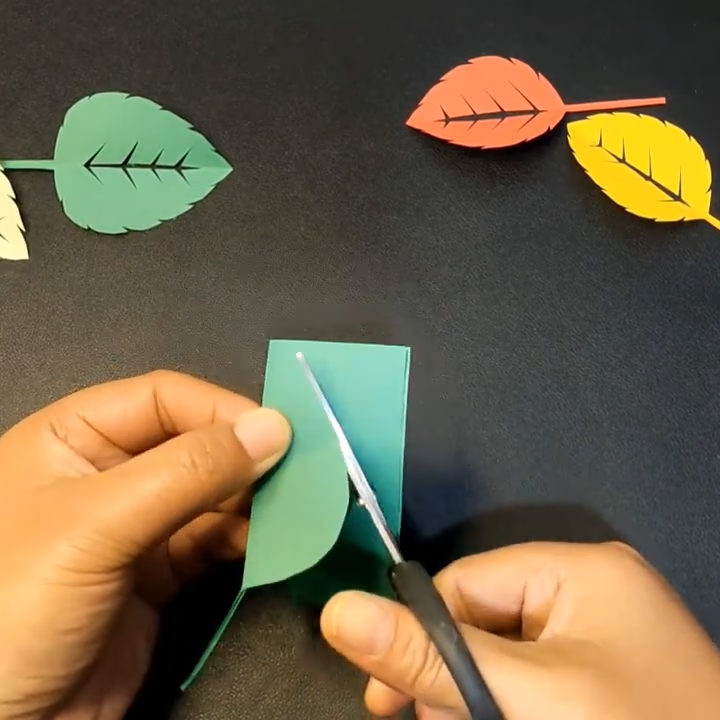
Curve out from the top of the stem to form the leaf base. Rotate the paper in your supporting hand to follow the broad outer curve. The next photo shows the paper turned in the maker's hands. Follow the curved cut back to the closed fold at the tip.
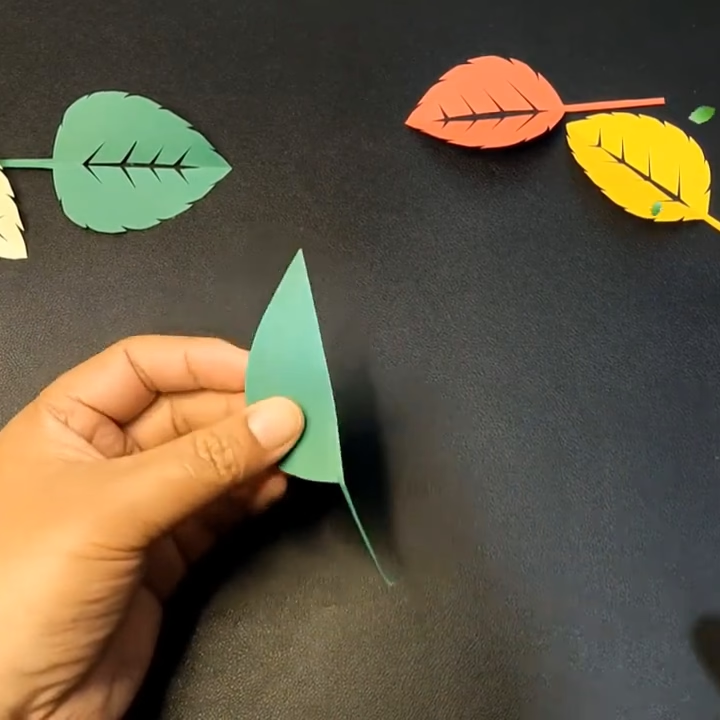
Turn the half-leaf back so the straight fold is on the right. You should see a pointed tip, a curved outer edge, and a stem still attached below. If the layers slipped, align them before cutting the details. The straight folded edge will become the center of the opened leaf. Later you will trim teeth from the curved edge.
Open the center, then add branches
The vein pattern in this leaf is made with openings. Start with a long, narrow opening along the fold; the small diagonal cuts will join it to make the branching shape. Green paper around the openings holds the leaf together. A crease can also cast a dark line, but the central gap shown below has already been cut.
Keep the closed fold on the right. Begin on that fold a little above the stem junction. Cut a very narrow notch upward just inside the fold, returning to the folded edge below the tip. Remove the thin strip. Leave uncut paper below the starting point and above the end so the stem junction and tip still connect the two sides. Do not cut from the bottom of the stem all the way through the tip.
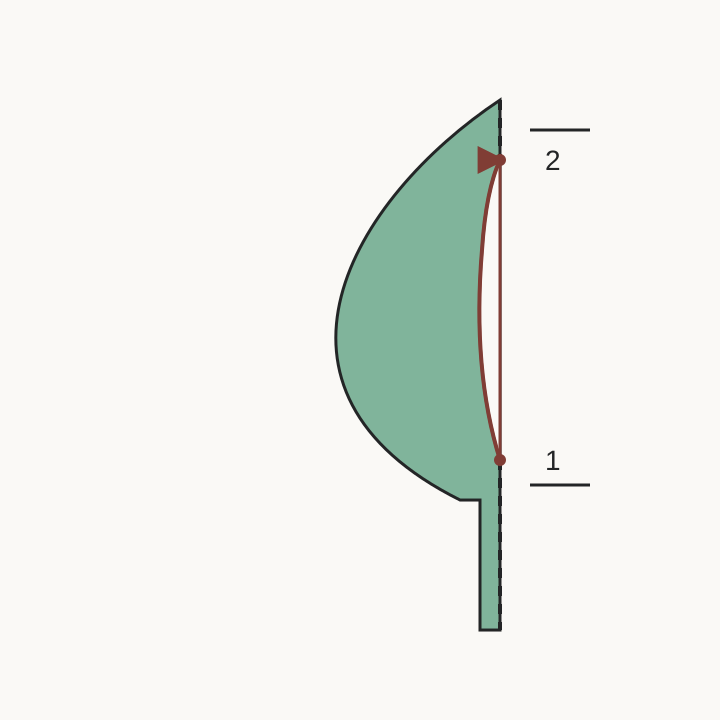
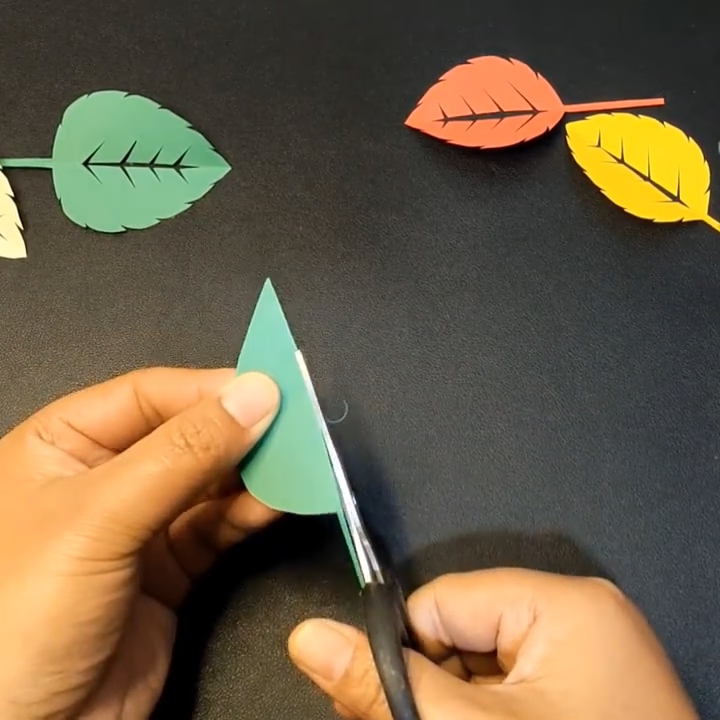
Open the leaf briefly. Look for a narrow gap between the two uncut stretches at the tip and stem junction.
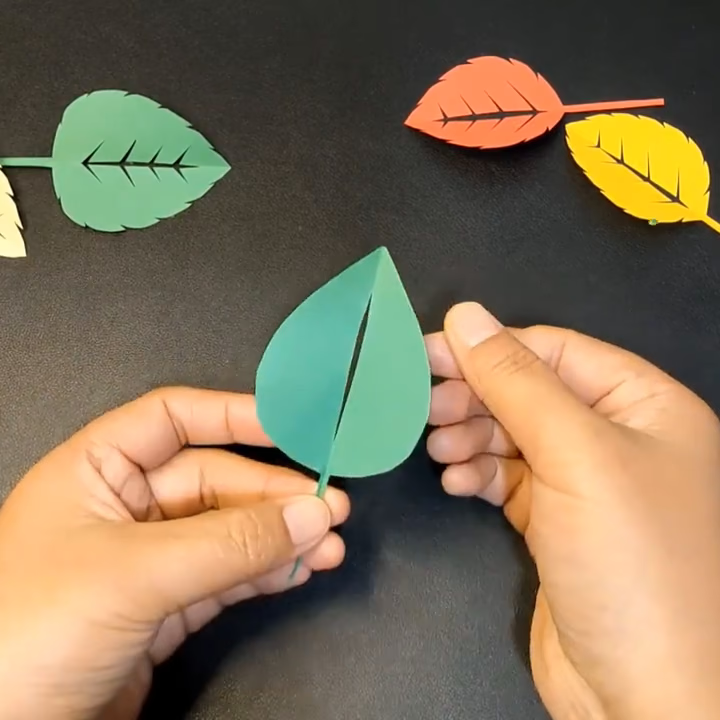
Fold the leaf back along the original crease. The folded leaf now has an open cut edge along the middle. Start each branch on that cut edge and angle diagonally into the leaf toward its tip. Stop well before the curved perimeter. Take a second cut close beside the first so the two meet and a sliver comes away into the central opening.
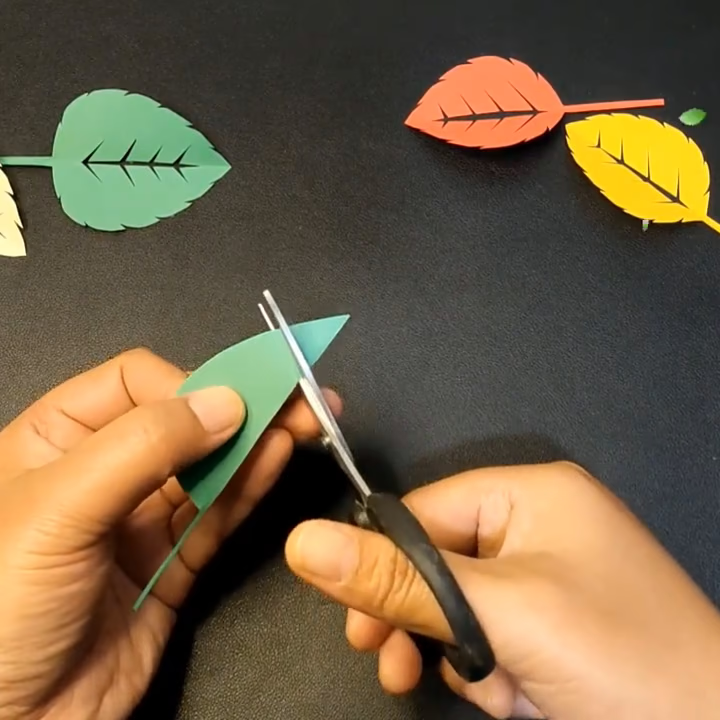
Repeat at separate places along the same cut edge, angling the branches toward the leaf tip. Leave green paper between neighboring branches and a continuous band between their inner ends and the outer curve. Near the narrow tip, shorten the branches to fit the available space. The photograph below shows this stage with the leaf still folded.
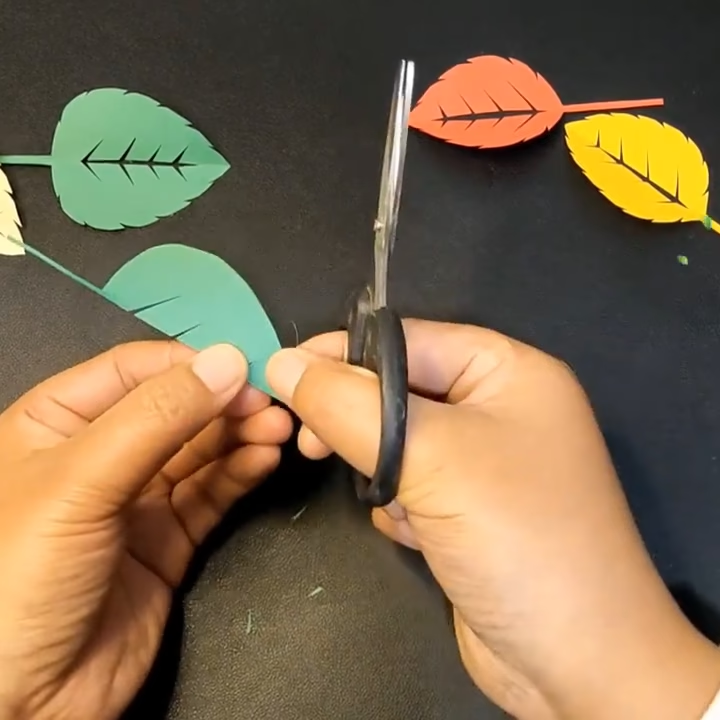
This demonstration adds the internal notches before trimming the edge. Tonglu Museum’s introductory leaf lesson describes an outline, a toothed edge, and internal details in a different order. Both examples use a fold, but their patterns differ. Follow the order shown here and preserve the paper still needed for the later edge cuts.
Give the outer edge small teeth
Find the curved outer edge and start along it below the tip. For each tooth, cut a short distance inward through both layers, then angle back out to the same edge to release a tiny scrap. Turn the leaf before the next cut. Keep the tip and stem junction intact.
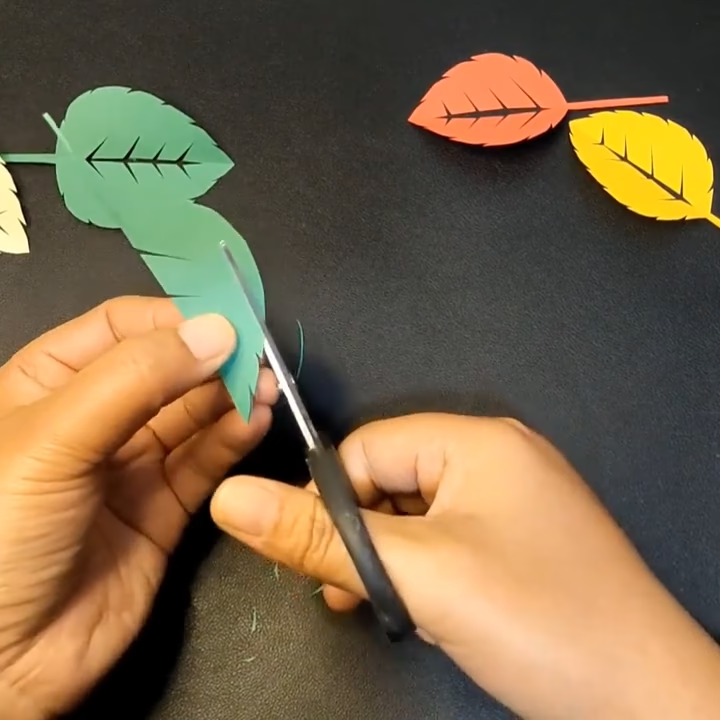
The next tooth needs a green strip between it and the closest branch opening. Make the cut shallower or leave that stretch smooth if the two would meet.
Open the leaf and check its connections
Set down the scissors. Support the leaf body, gently separate the layers at an open edge, and unfold around the crease. Free any loose offcuts without pulling on a narrow connection. Each diagonal notch should now appear on both sides of the center. The stem, tip, and paper around the outside should still form one leaf.
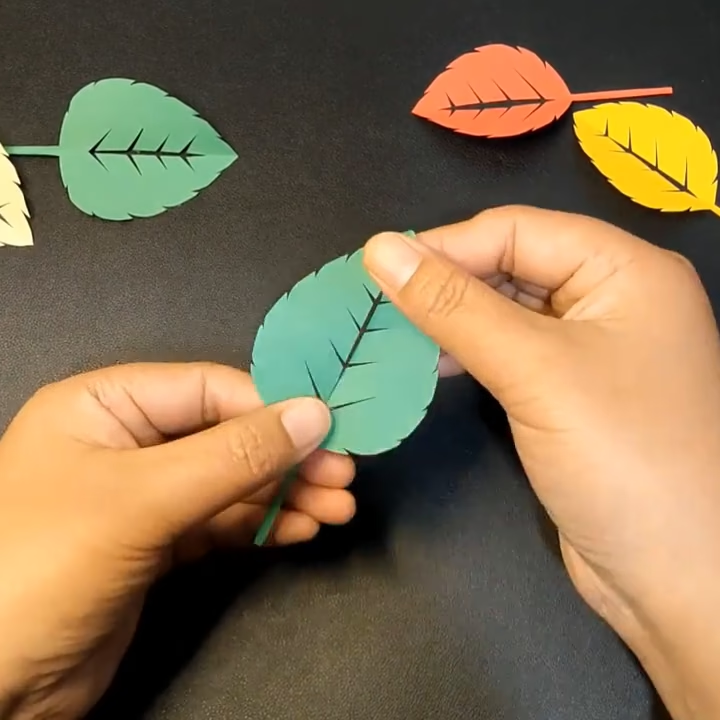
If an opening stays closed, first place the leaf against a contrasting background and check for a loose offcut or a fold shadow. Then refold along the original crease and check the cuts: does the central gap open between its two retained end connections, and do the paired branch cuts meet each other and that gap? Correct only an unfinished cut, with the paper supported and fingers clear. Do not pull the opening apart.
If the leaf tears or a section separates, stop adding detail. Find the break and compare it with the nearest internal and outer cuts. A meeting between those cuts can remove the connecting band, but a photograph alone cannot establish every cause of a tear. For the next leaf, leave more paper at that location and check the connection before making another nick. This is an editorial practice suggestion, not a tested material specification.
Hold the finished leaf against a plain background. Follow the green paper from the stem into the leaf base, around the openings, and toward the tip. The branching spaces make the vein pattern readable, and the paper around them lets you lift the whole leaf by its stem.
BeenEast Editorial. The photographs follow one continuous leaf-cutting demonstration; the two diagrams are original. Tonglu Museum’s lesson supports the broader learning sequence and shows a different leaf pattern. Paper size, weight, and an independent BeenEast physical trial are not documented.