

How to Read a Paper-Cutting Pattern
Recognize seven basic motifs in a teaching chart and real cut paper, then read a folded pattern to see what to cut and what stays joined.
By BeenEast Editorial · Published · Reviewed
Recognize seven basic forms
Read a paper-cutting pattern in two passes: recognize its shapes and how they repeat, then check the fold, the areas to remove, and the paper that stays connected. The seven forms below provide a small vocabulary for that first look.
Paper-cut artist Bovey Lee compiled the teaching chart used here. Three real scissor-cutting photographs show crescents, a spiral, and saw teeth in paper. The original leaf diagrams that follow explain how a half-pattern relates to an unfolded design.
Sources: Bovey Lee: Introduction to Basic Patterns in Chinese Paper Cutting (2012)
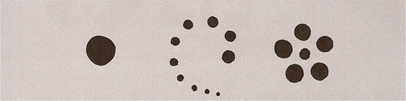
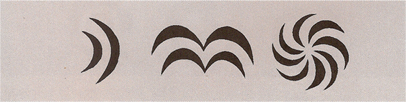
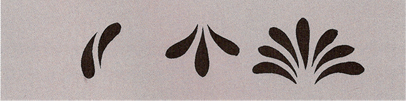
Each row shows a basic shape, ways to combine it, and a detail from a finished paper cut. In Bovey Lee’s chart, “Sun” names the circle forms and “Moon” names the crescents. Follow the outlines and the spaces around them. These examples show how a motif is built. A cutting pattern also needs a key to tell you what to keep.
1. Sun · Circles
Circles can stand for eyes, seeds, or fruit. One center with five surrounding circles makes the plum-blossom grouping shown here.
2. Moon · Crescents
A crescent is a narrow curved shape. Repeat or rotate it to build eyebrow-like arcs, waves, or a pinwheel.

3. Water Drop
A rounded end narrows to a point. Drop forms can be grouped into sprays, water-like movement, or plant details.

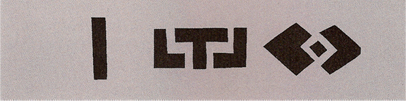
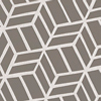
4. Geometry
A bar, square, or diamond can repeat into angular borders and woven-looking grids. Follow the turns and compare the gaps.
5. Cloud
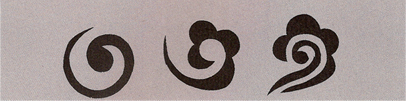
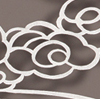
A curling line turns around a rounded center. Repeated curls can suggest clouds, mist, or smoke. Cloud motifs can also carry auspicious meaning.
6. Leaf
A pointed, tapered form reads as a leaf. Repeat it around a center or along a stem to build floral shapes.
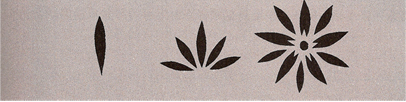

7. Saw Teeth
Repeated tapered gaps make a toothed edge. Straight and curved arrangements can suggest hair, feathers, petals, or grass.
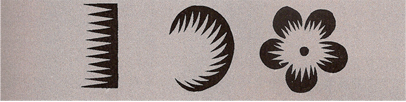
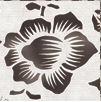
Teaching chart compiled by paper-cut artist Bovey Lee in 2012. Lee translated material from Minjian Jianzhi Jiqiao (2009) and provided the work details in the right column. Reproduced for educational use only.
Look at the same kinds of shapes in real paper
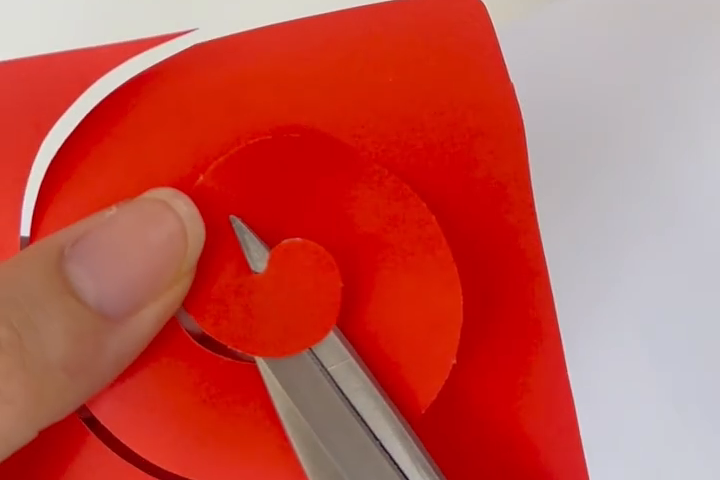
The pale band in the red paper is widest along the bend and tapers to the left. The same change in width gives the crescents in the chart their shape. Here the pale band is the background seen through a cut.
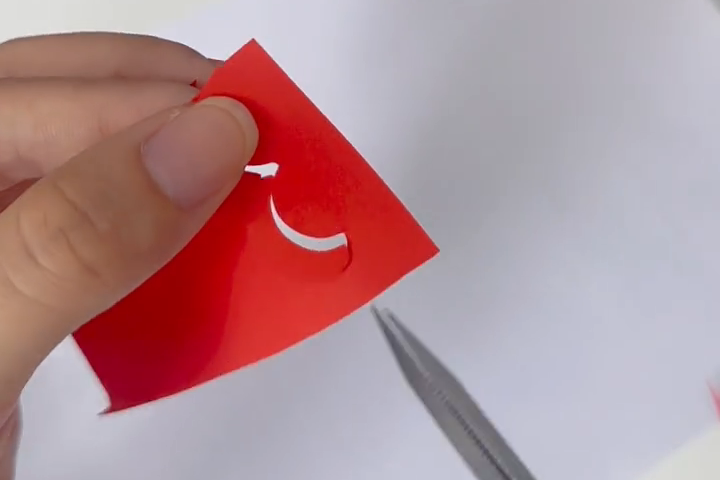
The rounded end by the scissor tips is red paper. The narrow slit curves around it, widening where the paper lifts away. You can trace a similar turn in the simplest curl in the chart’s Cloud row.
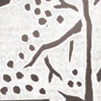
The pale triangular gaps enter from the edge. Between them, the red points stay attached to the broad strip above. The chart’s straight saw-tooth example repeats the same alternation. The spacing and slant give the row its rhythm.
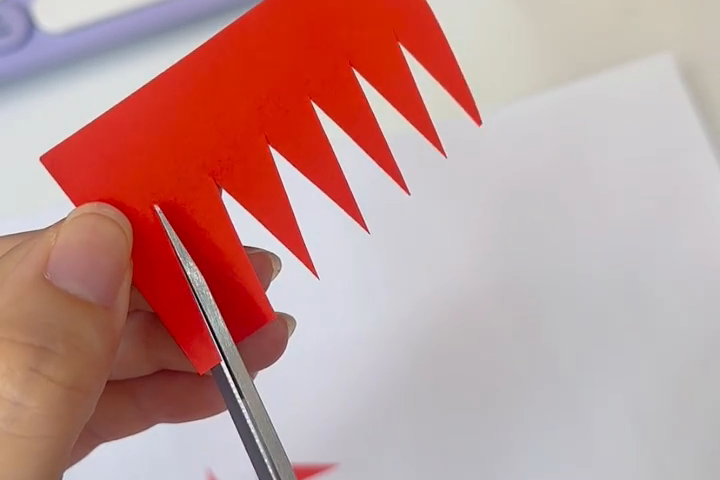
The three photographs come from separate demonstrations. The leaf drawings that follow use a separate design to show how to read a folded pattern.
Match the view to the fold
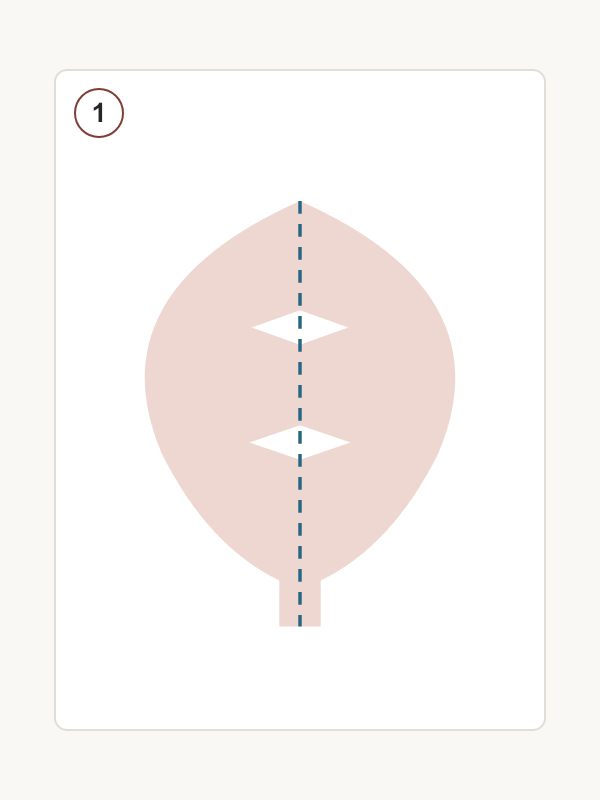
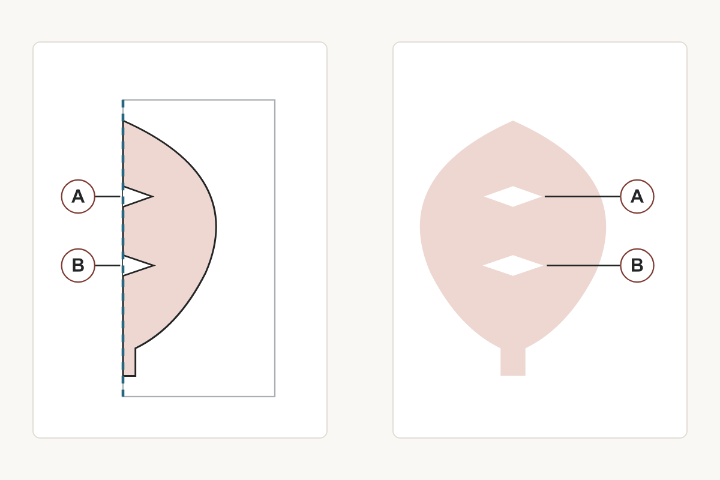
In view 1, both sides of the leaf and both diamond-shaped openings are visible. The center line shows where the two sides meet. View 2 shows a half-pattern on folded paper. Its closed fold is on the left, while the thin gray line on the right marks the open edge of the folded sheet. The leaf contour sits inside that sheet.
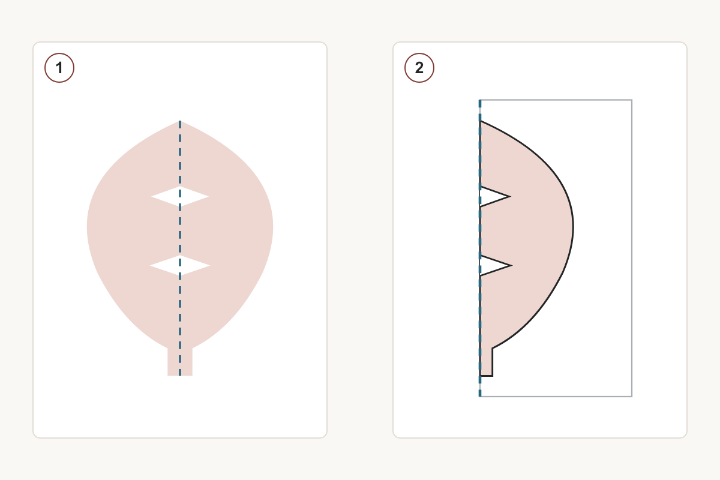
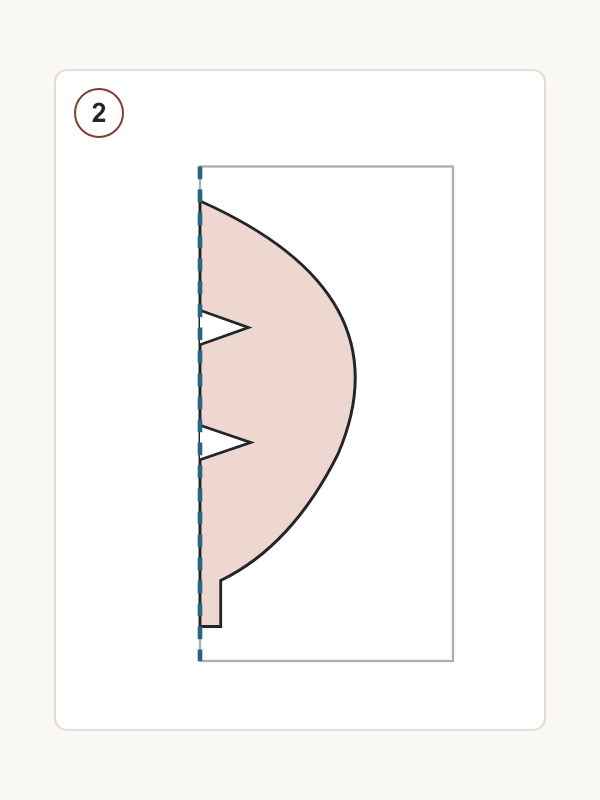
For this half-pattern, the straight side belongs against the closed fold. The curved side will become the leaf’s outside edge. A complete design image does not by itself specify this placement. Look for a folded view, a marked axis, or instructions that identify the fold before treating an image as a cutting pattern.
On real folded paper, a closed fold is a continuous bend joining the layers. At an open edge, the layers separate. A line printed on the page cannot replace that physical check. If the pattern does not identify its view or orientation, settle that question before cutting.
Sources: Tonglu Museum: Online Paper Cutting, Lesson 1, Cutting a Leaf (2020)
Read this pattern’s key
This diagram uses four marks. Read the filled regions as well as their borders: a narrow outlined area could be a strip of paper to keep or a space to remove, depending on the pattern’s key.
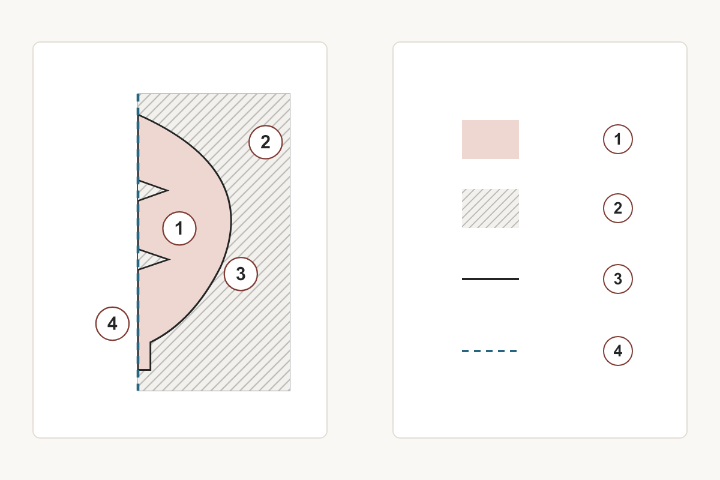
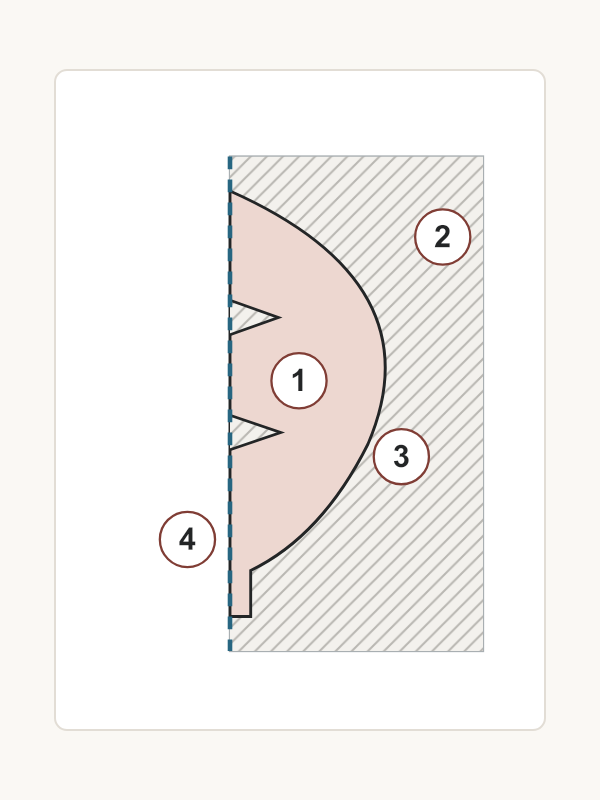
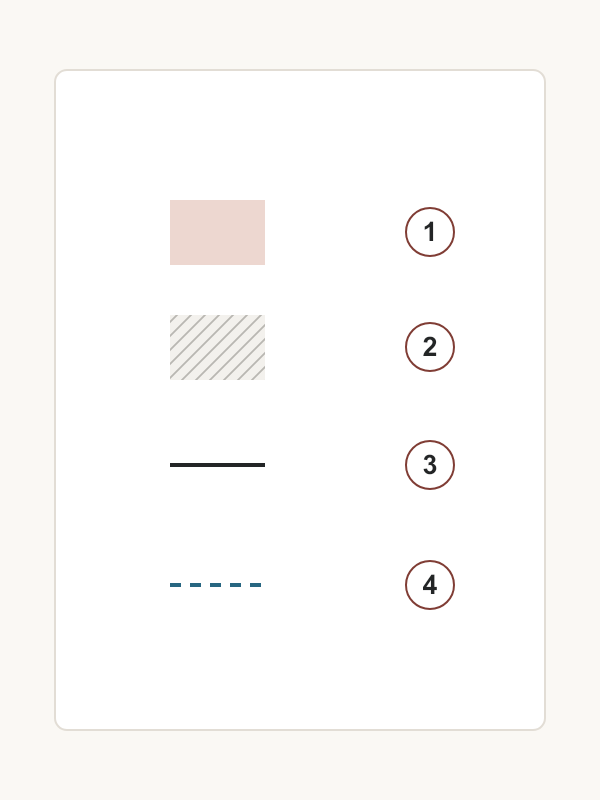
1. Pale pink is paper to keep. The leaf and its short stem belong to one retained shape.
2. Diagonal hatching is paper to remove. It appears both outside the leaf contour and inside the two triangular notches.
3. A solid dark line marks a cut: the curved outer contour or the two sloping sides of a notch.
4. The dashed blue line marks the closed fold. Where the fold borders pink paper, the two halves stay joined. The two hatched triangles mark where the openings meet the fold.
The thin gray rectangle only shows the limits of the folded sheet. The white page around it is the illustration background. Neither is an additional cutting instruction. The numbers label the key; they do not set a cutting order.
These conventions belong to this guide. On another pattern, read the author’s key before interpreting black, white, solid, or dashed marks. If a preview and its instructions do not make the retained areas clear, ask for a labeled view rather than choosing by color alone.
Follow a notch into an opening
Find notch A in the folded view. Its base lies on the fold and its tip points into the sheet. In the unfolded drawing, A has a matching half on the other side of the center line. Together they form one diamond-shaped opening. The lower notch B maps to the lower opening in the same way.
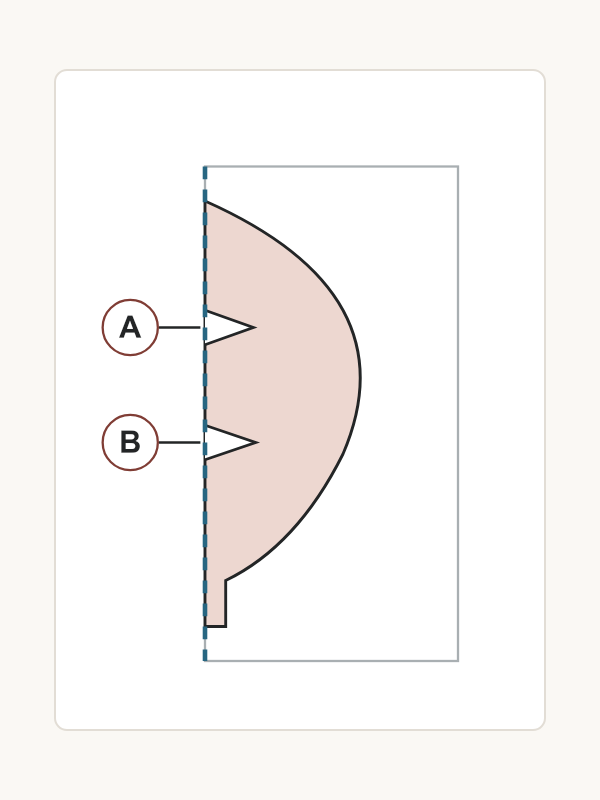
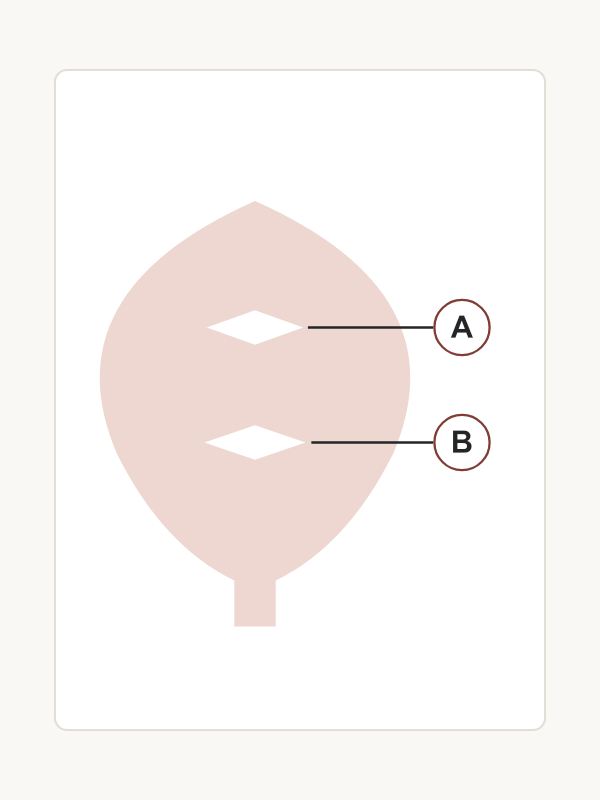
A fold-edge notch and an outer cutaway can both be hatched, yet they change different parts of the design. A and B become enclosed openings because paper surrounds them in the unfolded drawing. The waste beyond the curved contour separates the leaf from the rest of the sheet and defines its silhouette.
Before handling scissors, cover the unfolded drawing and predict its result. Point to the fold, find the two notches, and describe where their mirrored halves will appear. Then uncover the drawing and compare. This checks your reading of the layout; it does not tell you how well a particular paper will cut.
Trace the paper that remains
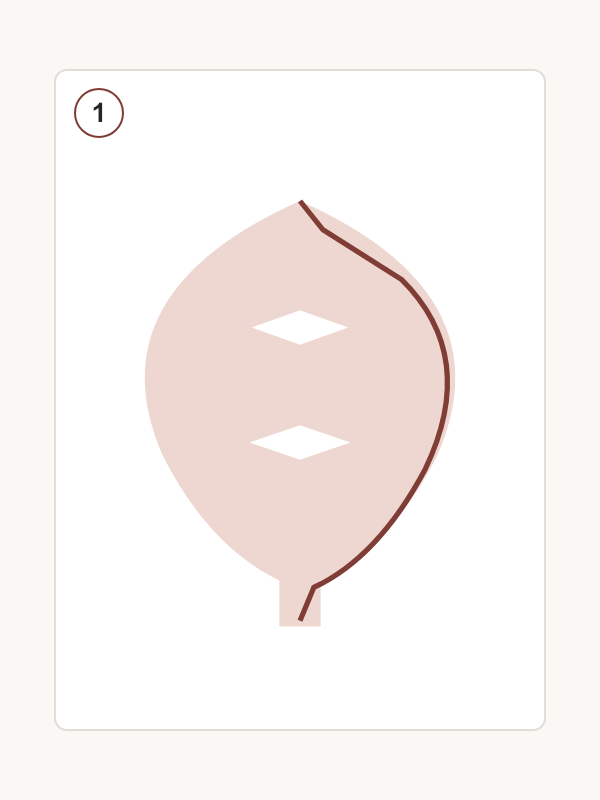
Start at the stem in view 1 and follow the red path up the right side of the leaf. It passes outside both openings and reaches the tip through retained paper. The strip between an opening and the outside edge is a paper bridge. In this drawing, it gives the lower and upper parts a continuous connection along the rim.
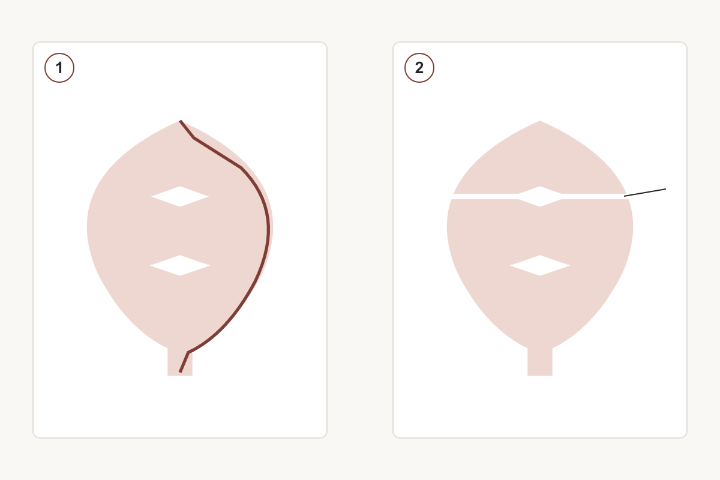
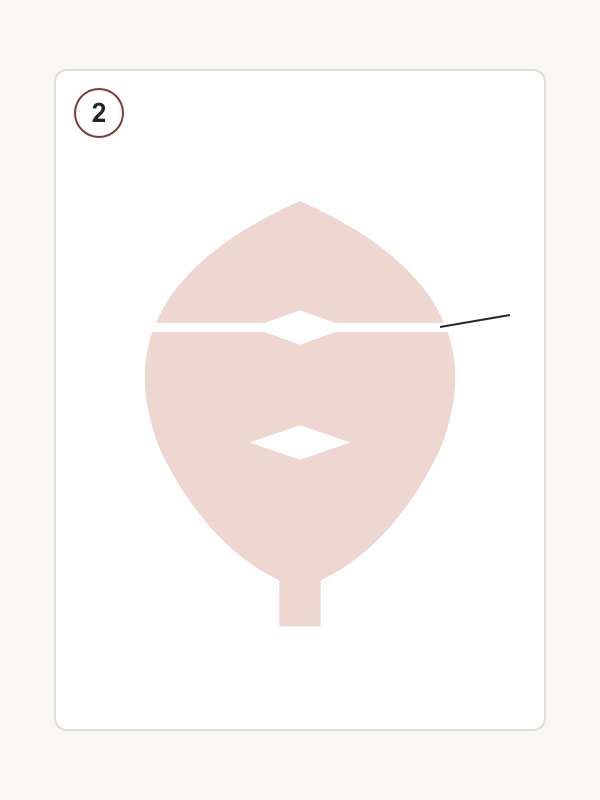
View 2 changes the upper opening so that a gap reaches the outside edge on both sides. The upper part is now separate from the stem and lower part. The gap is drawn wider to make that break visible. It demonstrates a lost connection, not a recommended clearance or a prediction of paper strength.
When a pattern is hard to read, check it in this order: identify the complete or folded view, confirm the fold’s position, read the keep-and-remove key, and trace a continuous path through the retained areas. If two openings meet, the strip between them disappears. If an opening reaches the outer edge, check what other connections remain before concluding that the whole piece will separate.
The leaf’s curved outline defines its silhouette; the two interior openings articulate the surface. The paper left between them lets both parts belong to one connected design.
References
Tonglu Museum: Online Paper Cutting, Lesson 1, Cutting a Leaf (2020)
Bovey Lee: Introduction to Basic Patterns in Chinese Paper Cutting (2012)