

How stitch direction makes an embroidered leaf look curled
max ·
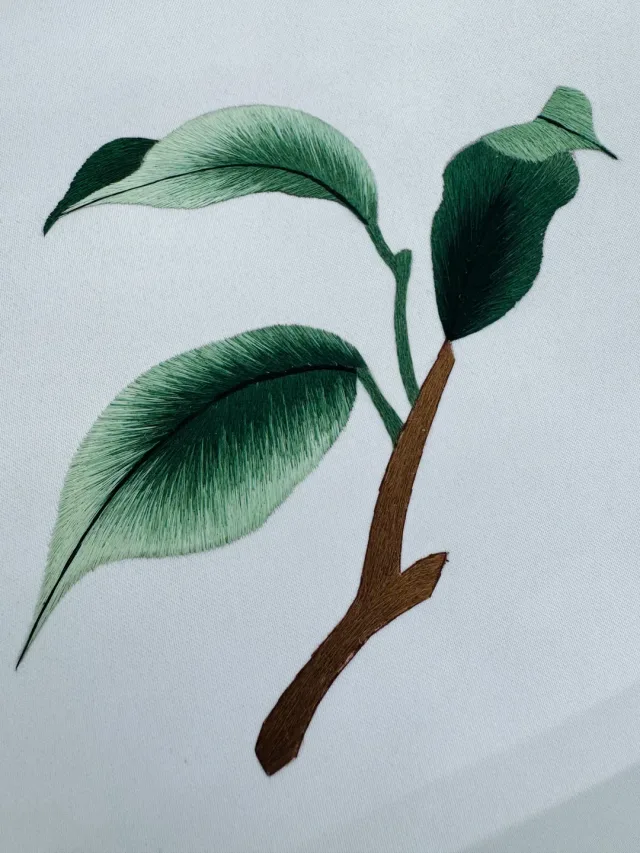
An embroidered leaf can look curled even on flat cloth. The stitches change direction around a curved center, while the shift from pale to dark green gives the leaf a sense of depth. In the full branch, look at the upper left leaf first. Its pointed dark tip and pale green sweep make the turn easy to spot.
Read the direction before the outline is filled
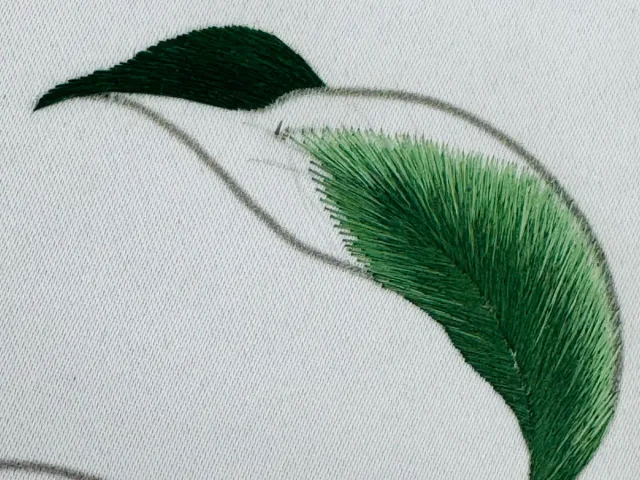
In the partly filled leaf, the outline is still visible on the cloth. Look at the tips of the green stitches where they end against the unfilled area. The stitches spread out as they approach the rounded outer edge and draw together toward the inside of the curve.
Find the turn in the filled leaf
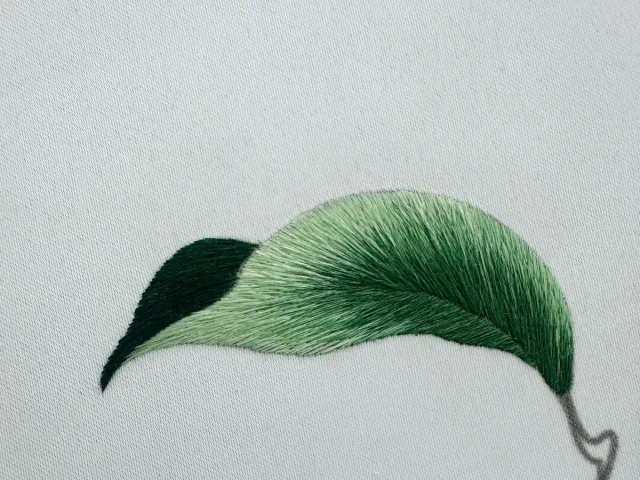
In the filled view of the same leaf, follow the pale green band toward the darker center. The stitch lines change angle as they move around the curve, and the dark patch at the tip stands apart. Viewed together, those details make the leaf look as if it turns back on itself.
Compare a broader leaf
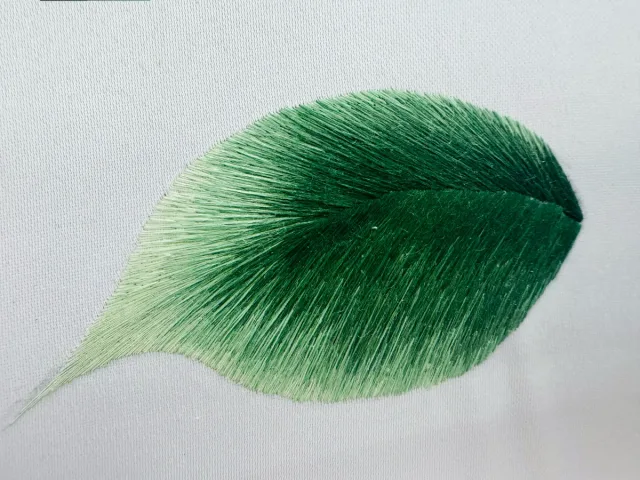
The last photo shows a broader leaf study. Here the stitches fan away from a dark central line toward a lighter rim, so the face of the leaf is easy to read. Next time you look at an embroidered leaf, trace the middle first. Then follow a few individual stitches outward to see where their direction changes.
 Embroidery
Inspiration and guides on embroidery.
Explore Embroidery