

How to Make a Repeating Indigo Pattern with Clamps
Fold a cotton square into stacked triangles, clamp and dip it in indigo, then open the cloth one fold at a time to see the repeat.
By BeenEast Editorial · Published · Reviewed
Prepare one cotton square
To make a repeating indigo pattern, accordion-fold a prewashed cotton square into a strip, fold the strip into a stack of triangles, and clamp the stack before dipping. The slats squeeze several layers in the same place. When you open the cloth, those areas appear as repeated pale marks.
Sources: Museum of Fine Arts, Boston — Shibori
Start with a lightweight, plain white cotton square, four smooth wooden slats of the same size, and strong rubber bands. The photographed arrangement uses the slats in two matching pairs. Keep water for wetting the bundle, gloves, and a protected surface ready. Set up your indigo vat in a well-ventilated work area using the kit directions and equipment reserved for dyeing. This exercise uses itajime, a Japanese approach to resist dyeing in which pressure slows dye penetration into folded cloth.
Fold a strip, then stack triangles
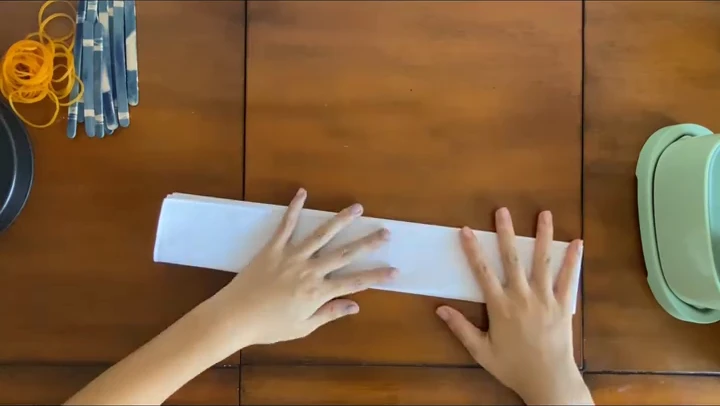
Lay the square flat and fold a narrow band along one edge. Flip the cloth over and fold the next section back by the same width. Repeat to make a long strip. Seen from the end, the folds zigzag like a fan. Keep the strip the same width from end to end so the next set of folds can line up.
Sources: Museum of Fine Arts, Boston — Shibori
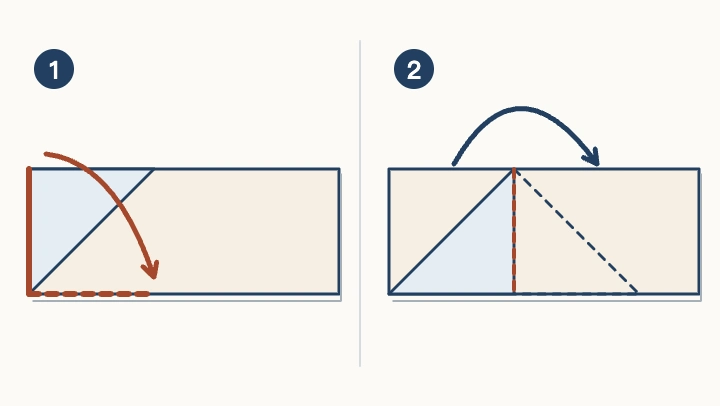
Make a diagonal fold at one end of the strip. In the diagram below, the strip lies left to right: bring the upper-left corner down and to the right until the short left edge meets the bottom long edge. The orange lines mark those two edges. The photograph shows the same edge-to-edge fold starting at the right end of the strip.
Sources: Museum of Fine Arts, Boston — Shibori
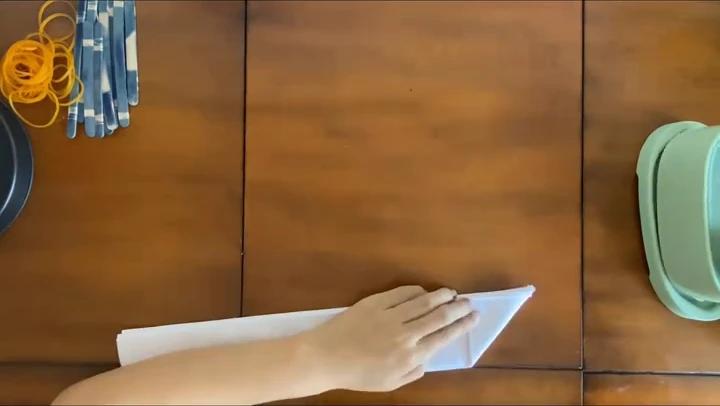
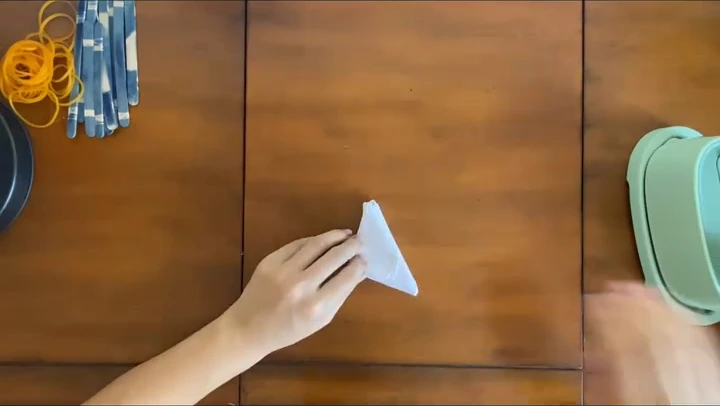
Continue making equal diagonal folds along the strip. The demonstration presses the creases before gathering the layers. Fold back and forth along those creases so the triangles lie over one another, rather than winding the strip around the bundle. Press the finished stack flat. Its points and edges should line up; reopen and adjust any layer that pulls the stack out of shape before adding the slats.
Clamp the same area on both faces
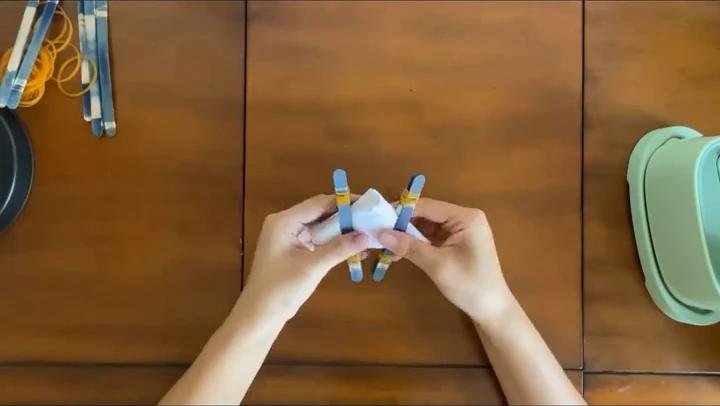
Place one slat above the folded triangle and a matching slat directly below it. Band the projecting ends together. Add the second pair across another part of the stack, as shown, with each upper slat aligned over its lower partner. Leave some cloth exposed between and beyond the wood. Pressure slows dye penetration where the layers are squeezed; the exposed folds can take up more dye. Lift the bundle by the wood and gently tilt it. If a layer creeps out or a slat shifts, reset the stack and secure it before dipping.
Sources: Museum of Fine Arts, Boston — Shibori
Dip, lift, and let the indigo turn blue
Wet the clamped bundle in plain water before the first dip, and let excess water drain. Wear gloves, lower the bundle gently into the prepared vat, and keep the slats in place between dips. When you lift it out, the exposed cloth may look yellow-green at first. It turns blue as the indigo reacts with oxygen in the air.
Sources: Jacquard — Indigo Tie Dye Kit Quick Start
Use your kit’s dip and air times. The Jacquard kit, for example, calls for air exposure before another dip. The visible blue is a cue on the exposed cloth. Keep the recommended air time before deciding on another dip, and leave the stack closed until you reach the kit’s rinse and release step.
Open one fold at a time and trace the repeat
Follow your kit’s rinse and release sequence. Rest the bundle on a protected surface, release the bands, and remove the slats one pair at a time while supporting the cloth. At this stage the layers are still compressed together. Keep the bundle folded briefly so you can connect the wood’s position with the cloth it held, then ease the layers apart without pulling on a single corner.
Sources: Jacquard — Indigo Tie Dye Kit Quick Start
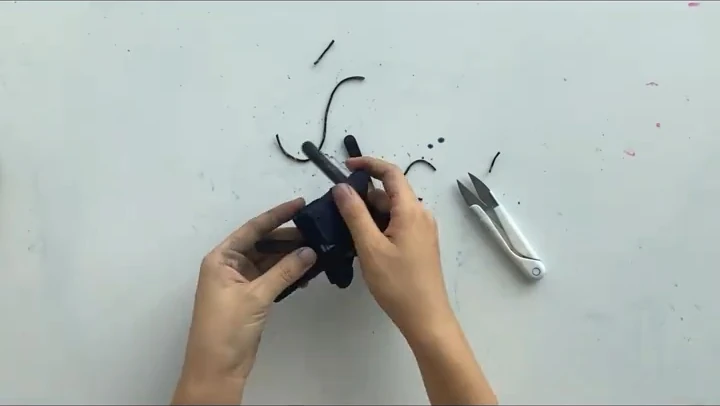
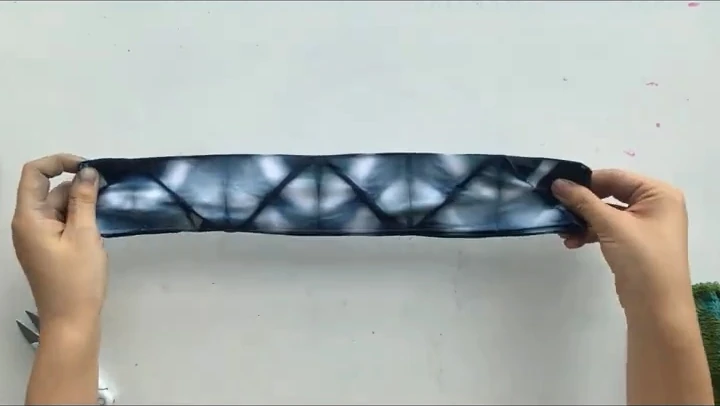
Undo the triangle folds until the cloth opens into a long strip. Leave the lengthwise accordion folds closed for a moment. In the photograph, dark diagonal bands divide the strip into repeating sections, with pale patches between them. Following one section to the next makes the repeat easier to see before the whole square is open.
Now spread the remaining accordion folds into a square. The single row becomes a field of repeats: dark diagonals meet across adjacent rows, framing pale patches. A light blue border marks the gradual transition around those patches. Compare corresponding parts of two neighboring repeats; the overall arrangement can repeat even when their edges differ.
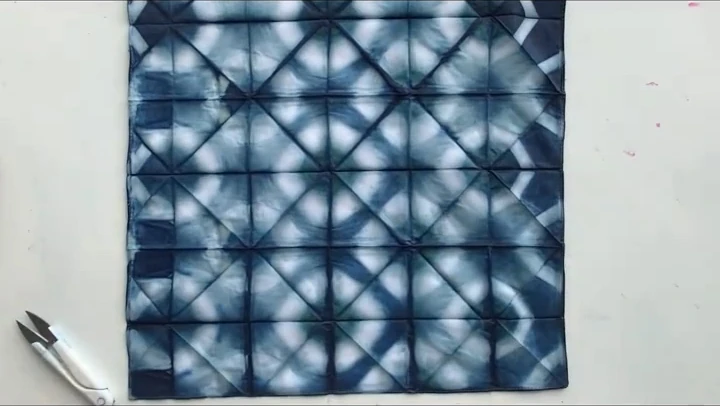
Finish washing and drying according to your kit before comparing color and edge definition. For a second square, keep the cotton, folds, slat positions, and dye sequence the same and change only how firmly the slats are secured. Compare the same pale patch in each repeat once both samples are dry. This tests the effect of pressure without changing the fold pattern at the same time.
Continue reading
Reuse and citation
English PDF and Markdown contain the text; their photo links open the illustrated guide.
BeenEast Editorial. How to Make a Repeating Indigo Pattern with Clamps. Version 1.0 (2026-11-13). https://community.beeneast.com/guides/hand-dyeing-indigo-clamp-resist
References
Museum of Fine Arts, Boston — Shibori