

Paper Cutting for Beginners: A First Folded Pattern
Fold one sheet, cut three small notches, and unfold it to see how connected paper holds three diamond-shaped openings.
By BeenEast Editorial · Published · Reviewed
See what stays connected
Start with one fold and a few wide openings. Before you cut, decide which paper stays connected and which pieces come out to leave open spaces. This BeenEast practice pattern uses ordinary paper and three diamond-shaped holes. Chinese paper cutting, or jianzhi, can use scissors or a knife. For this sample, use scissors. Chinese paper cutting includes many other patterns and methods.
In this guide’s diagrams, red marks the paper you keep. White diamonds mark the openings in the unfolded sheet. A paper bridge is a continuous strip between openings or between an opening and the outside edge. The Shaanxi Intangible Cultural Heritage Digital Museum describes two ways of building a design: in yangke, retained lines form the design and remain connected; in yinke, cut-away lines form the design. For this exercise, keep the sheet in one piece. A slit can be intentional in other designs.
Sources: Shaanxi Intangible Cultural Heritage Digital Museum · Chinese Paper Cutting
Gather an ordinary square of paper about 6 in. (15 cm) on a side, paper scissors, and a pencil. A contrasting sheet underneath can make the openings easier to see. Skip specialty paper and craft knives for this sample. Test your scissors on two layers of a scrap. If the paper bunches or the blades bind, switch to easier-to-cut paper or scissors suited to it. Children should use age-appropriate scissors with adult supervision. Keep fingers clear of the cutting path.
Fold once and mark the cutouts
Lay the square flat. Bring its left edge over to meet the right edge and press the center crease. The folded rectangle now has a closed left edge. Its right, top, and bottom edges are open, with two layers you can separate. Touch the left edge to check that it is one continuous fold.
Sources: Shaanxi Intangible Cultural Heritage Digital Museum · Chinese Paper Cutting
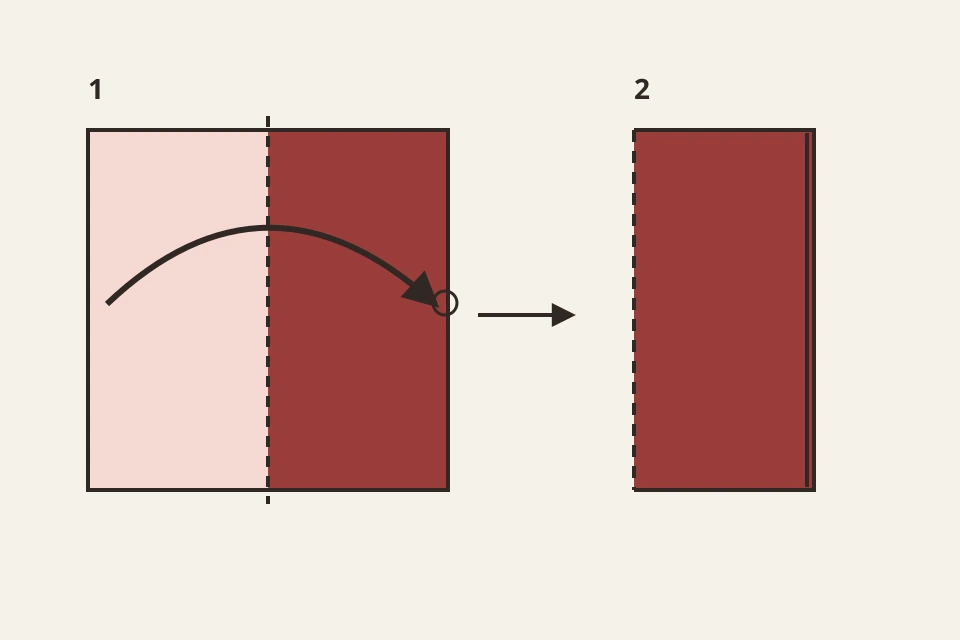
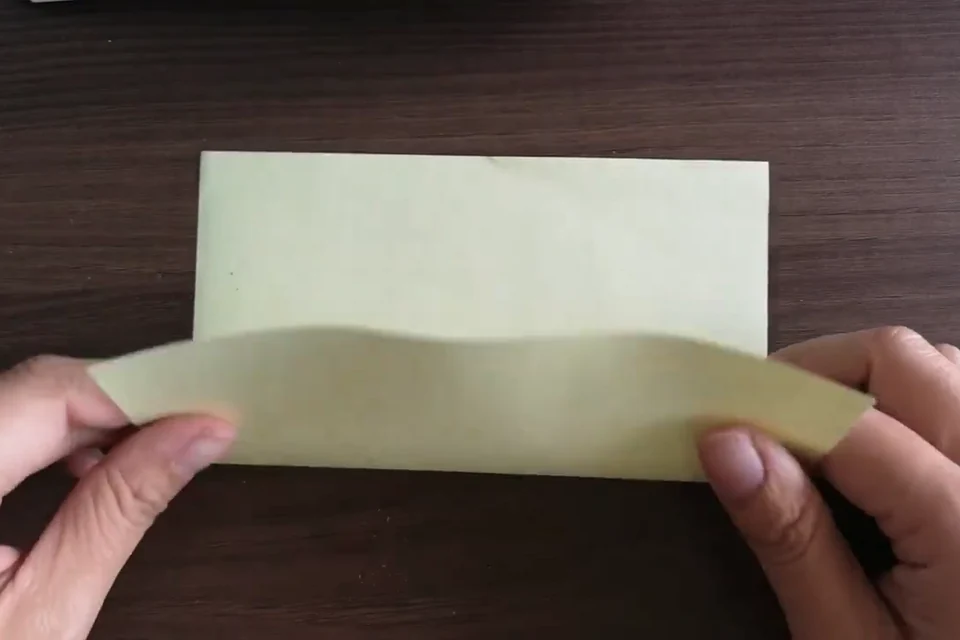
These photos follow a separate folded-paper demonstration. The maker folds the near edge away, then folds the sheet a second time for a curved pattern. For the three diamonds in this guide, fold once as shown in the diagram, with the closed edge on your left.
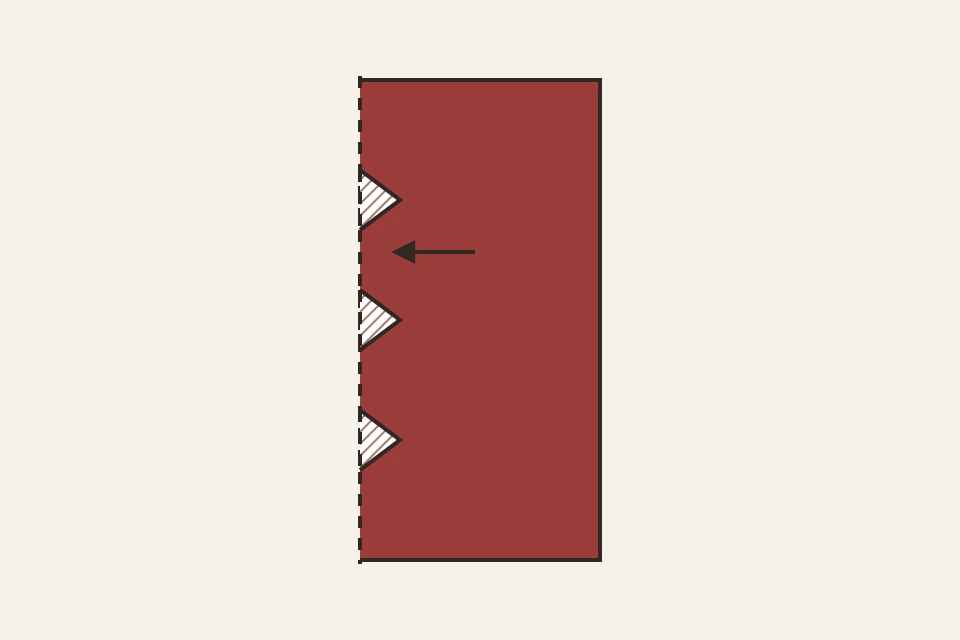
Draw three small triangles at separate spots along the closed left edge. Each base sits on the fold and each tip points right, well short of the open edge. For this sample, draw each base about 3/4 in. (2 cm) long and each tip about 1/2 in. (1.3 cm) in from the fold. Leave roughly 1/2 in. (1.3 cm) or more between triangles and between the nearest triangle and either end of the fold. Leave a wide strip of paper on the right. These are practice dimensions, so check that the bridges feel easy to handle on your paper.
Hatch the inside of each triangle with your pencil. The hatching marks the scrap. The two slanted sides are the cut lines. Leave the rest of the fold intact.
Cut from the fold to the tip
Hold the two layers aligned by a wide area you plan to keep, with your fingers away from the blades. For the first triangle, start at A on the fold and cut along the slant to C. Stop at C. Start again at B and cut to the same point. Lift out the triangle and repeat for the other two marks.
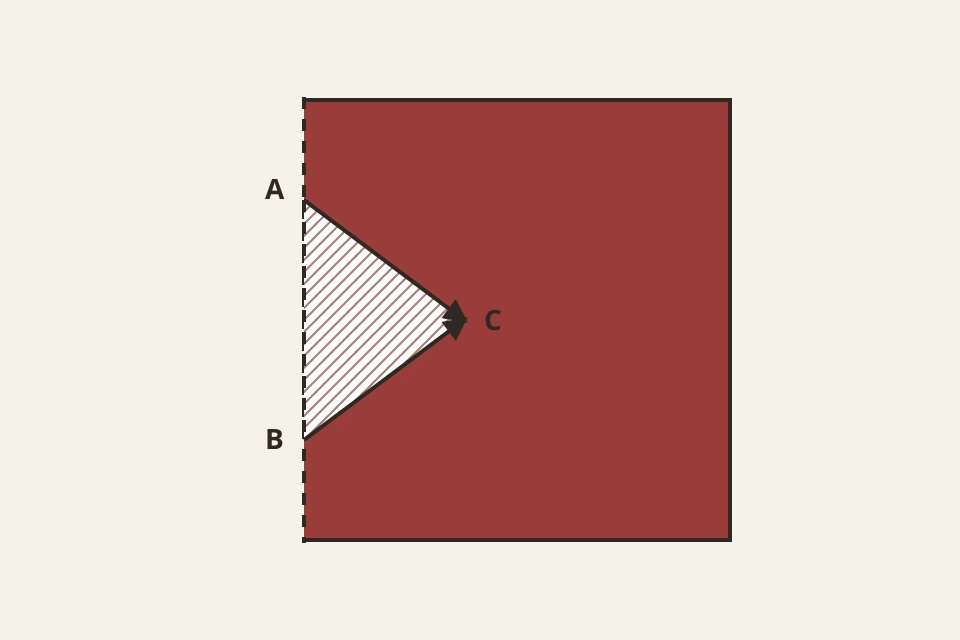
One cut leaves a slit. The opening appears when the two cuts meet and the scrap comes free. If the little piece stays attached, stop and look for the uncut connection. Follow the original line just far enough to finish the cut. Pulling the scrap can tear the paper you meant to keep.
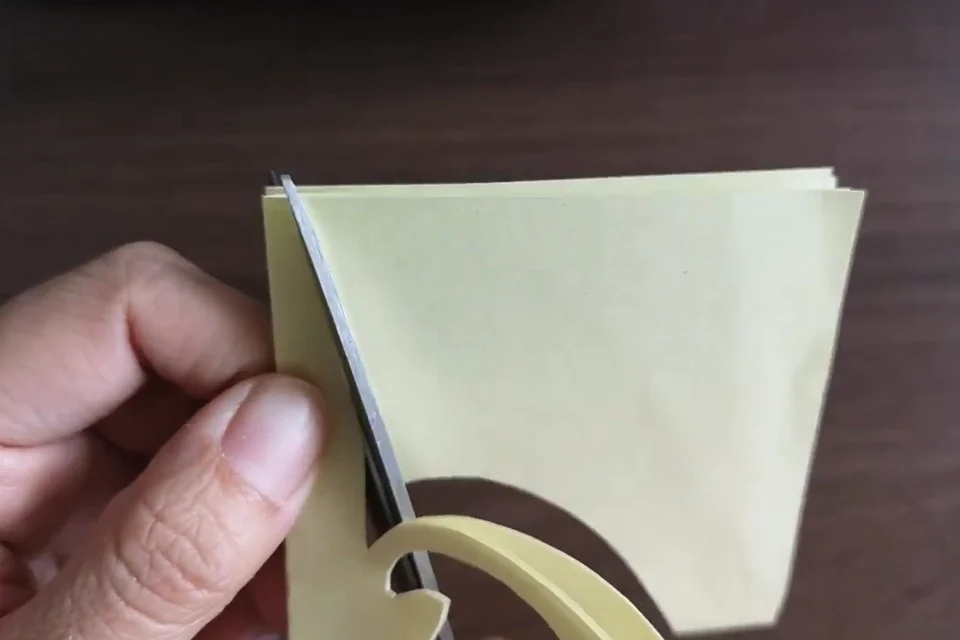
Unfold the sheet and check the bridges
Support the broad areas with both hands and open the paper gently along its crease. Each triangle mirrors across the fold to make a diamond. You should have three holes down the middle and an intact outside edge. Cutting from the open right edge makes a notch at the edge when you unfold, so the position of the closed fold determines where the holes end up.
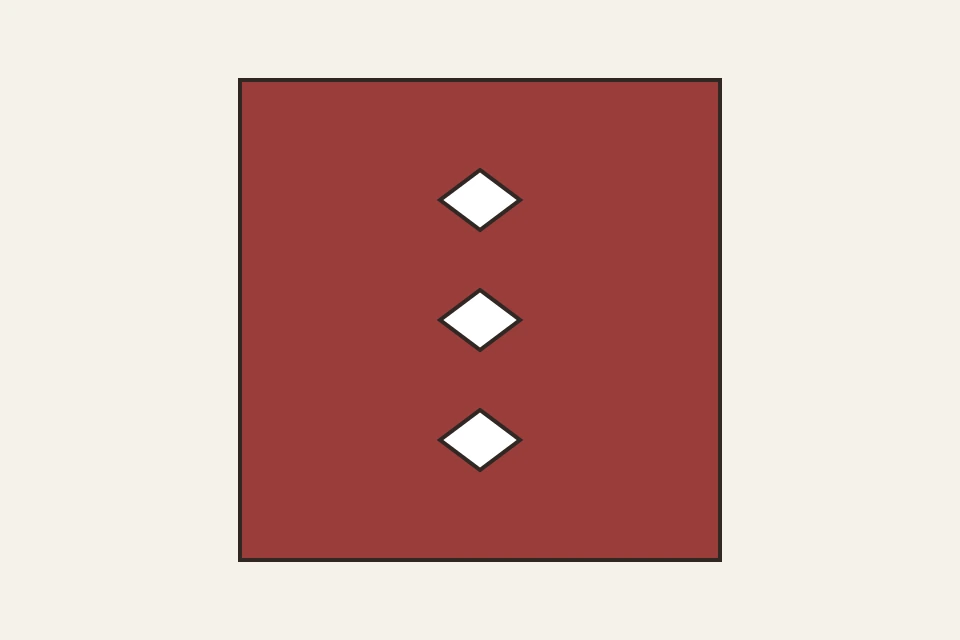
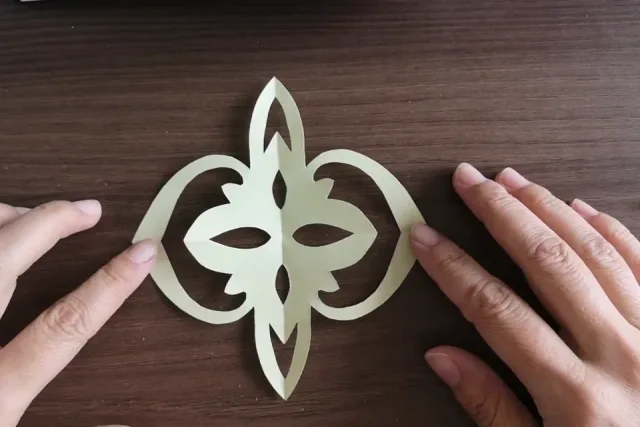
If the result surprises you, compare the opened sheet with your pencil marks first. Next, check that you started at the closed fold, kept the layers aligned, and met at the tip with both cuts. Then check whether the scissors squeezed or dragged the paper. If adjacent diamonds join and the paper between them falls out, the bridge was cut through. Leave any stuck paper alone until you find the connection. An added backing can change how the result looks, but the practice sheet itself needs a new cut. Start again on fresh paper with wider bridges.
On a second sheet, change either the notch shape or the spacing. Keep the other the same and compare the openings and the paper between them. When you want to practice curves, try the leaf lesson that Tonglu Museum published in 2020. In it, Tian Jinlian shows how folding helps shape a leaf outline and how cuts make the veins.
Sources: Tonglu Museum · Online Paper Cutting, Lesson 1: Cutting a Leaf (2020)
BeenEast Editorial designed the geometric exercise and drew its four original diagrams. The three photographs are frames from the same separate folding and cutting demonstration. The measurements are examples for this guide’s exercise.
References
Shaanxi Intangible Cultural Heritage Digital Museum · Chinese Paper Cutting
Tonglu Museum · Online Paper Cutting, Lesson 1: Cutting a Leaf (2020)