

Carve and Brush-Print Your First Single-Color Woodblock
Follow one animal-shaped block from transferred lines and shallow cuts to brush inking, paper-back pressure, and a readable single-color proof.
By BeenEast Editorial · Published · Reviewed
Make one raised shape, then print it
To make your first single-color woodblock print, transfer a reversed drawing to prepared wood, leave the image standing while clearing the surrounding wood, brush ink onto that raised surface, and lay paper against it. Pressure applied from the paper’s back transfers the ink. Lift the sheet to read a proof: a trial impression that helps you decide what to change before printing again.
Sources: Asian Art Museum · Woodblock printing and reversal · UNESCO · China engraved block printing technique
The photographs follow one pointed-eared animal silhouette through a Chinese water-based woodcut lesson taught by printmaker and teacher Yang Pengcheng. The recorded lesson is identified as part of Jingtian Printmaking’s teacher-support course. Yang’s own account of teaching at Shenzhen University explains how paper moisture, inking, and pressure shape the impression. Here, we stay with the lesson’s black-ink stage; its later multicolor printing is a separate task.
Sources: CAFA · Yang Pengcheng on teaching water-based woodcut
Begin with prepared wood that your woodcut tools can cut cleanly, a stable clamp or carving fixture, your own broad asymmetric drawing, carbon transfer paper, brush-compatible black printing ink, an ink brush, suitable printing paper, a clean dry backing sheet, and a baren—a flat hand-rubbing tool. This exercise also requires a compatible sheet holder that fixes one edge while allowing the sheet to lift clear of the block. Have your teacher or kit supplier confirm the holder, block, paper, and ink work together before starting. The demonstration uses prepared xuan paper, a thin Chinese printing paper. Follow the preparation for your actual paper and ink; the video does not establish a wood species, ink brand, dilution ratio, or universal dampening time.
For a first drawing, keep the body broad and give any eye or gap enough room to carve without chasing a hairline. You do not need to copy this animal. Its pointed head, round eye, and long tail simply give us three landmarks to track through the photographs. If you have never used a woodcut blade, have a teacher check your grip and first cuts before working near a small retained detail.
Transfer the drawing without adding another reversal
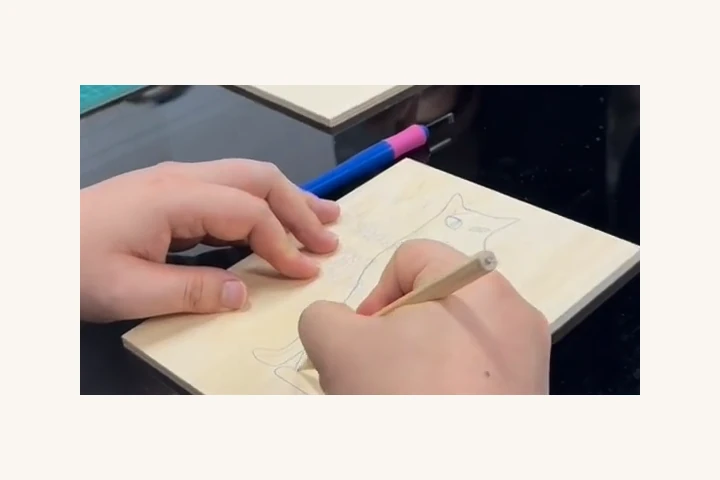
Decide which way your finished image should face, then mirror that drawing before carbon tracing. Place the carbon sheet coated side down on the wood and the mirrored drawing face up above it. Secure the papers outside the image so they cannot creep, trace the outline, and lift a corner to check that the line has transferred before removing them. Carbon tracing keeps the drawing’s direction on the block; printing will reverse it once.
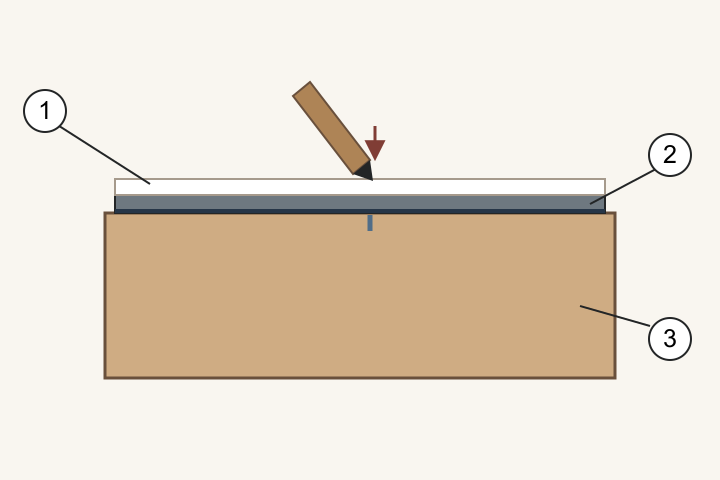
This differs from the face-down pasted transfer in the first guide. In that method, turning the drawing onto the wood supplies the first reversal. Here, mirroring the drawing supplies it. Applying both reversals would put the block back in the original direction and leave the final impression reversed from your intended design.
Sources: Asian Art Museum · Woodblock printing and reversal
Secure the block and make a shallow test cut
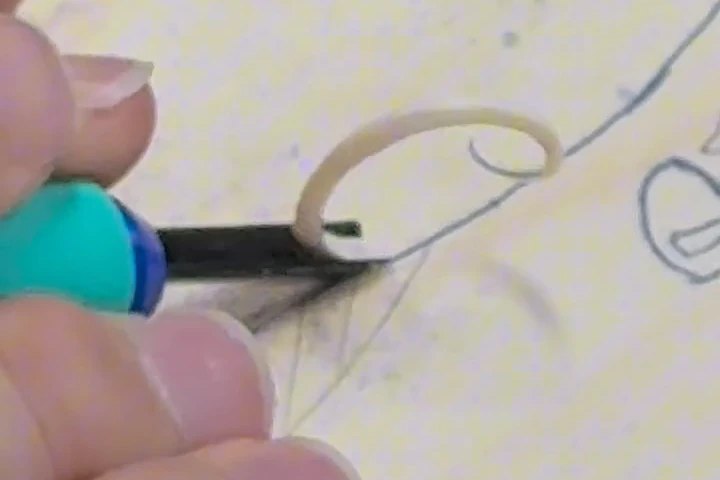
Clamp the block to a stable surface or use a carving fixture that prevents it from sliding. Keep the clamp clear of the intended cut. Both hands belong behind the cutting edge; turn and secure the block again when a new direction would put a hand in the blade’s path. The close-up photographs show how wood is removed, while the diagram below supplies a beginner workholding arrangement.
Sources: Flexcut · Workholding for beginning carvers
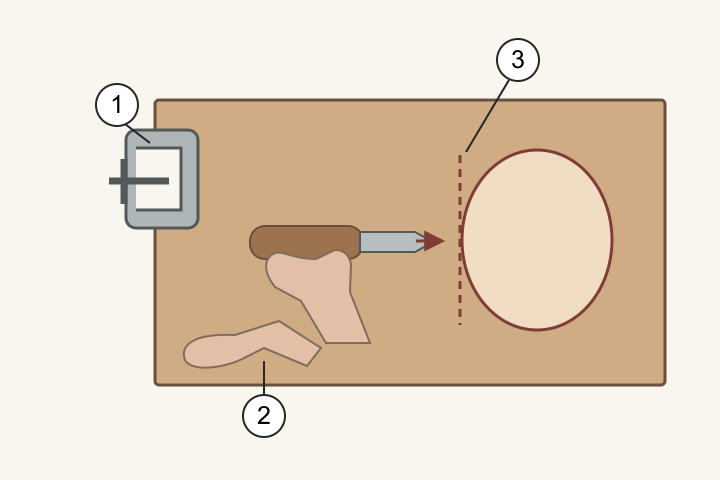
Try a short, shallow cut in a waste margin or a matching offcut before approaching the image. Start with the cutting edge resting on the wood, push a small distance, and stop while the tool is still under control. A small shaving and a defined track tell you more than a deep gouge. If the tool skids, the block moves, or the wood tears ahead of the edge, stop and check the fixture, blade condition, and cutting direction. Do not compensate by pushing harder.
Preserve the outline while clearing the background
Work along the outside of the line you want to keep. Establish a shallow boundary cut before clearing toward it, then remove small amounts of background wood without levering against the retained shape. Rotate and secure the block so each cut approaches a boundary you can see. At the head points and narrow tail, leave support until the adjacent waste has been reduced; prying out a large chip can take the wanted edge with it.
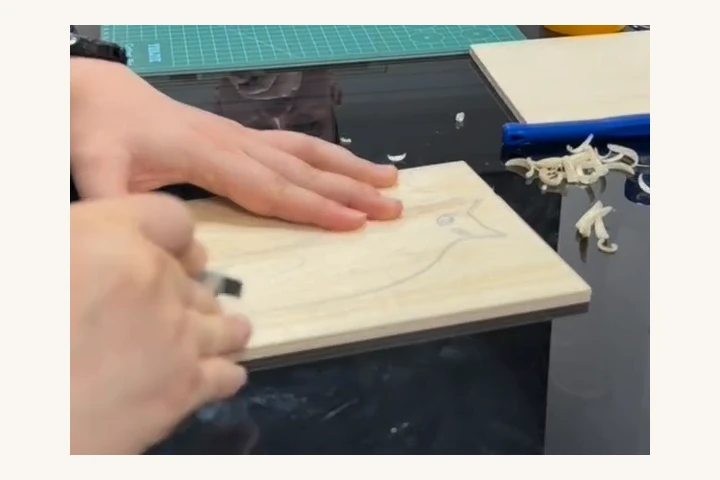
The eye and the space between the body and tail must be lower than the printing surface if they are to stay white. Brush loose chips away with the blade set aside. View the block at a low angle to find splinters and isolated high spots in the cleared areas. The useful stopping point is a continuous retained silhouette with open gaps; this demonstration does not supply a universal carving depth. The proof will reveal whether any unwanted high wood still touches the paper.
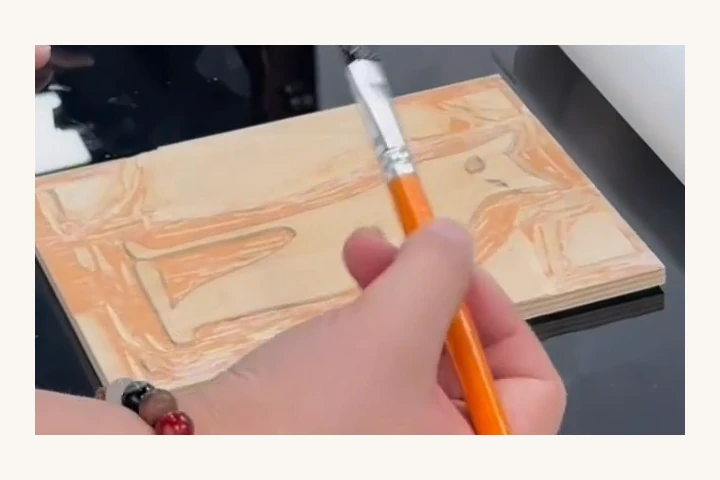
Prepare the paper, then brush the raised surface
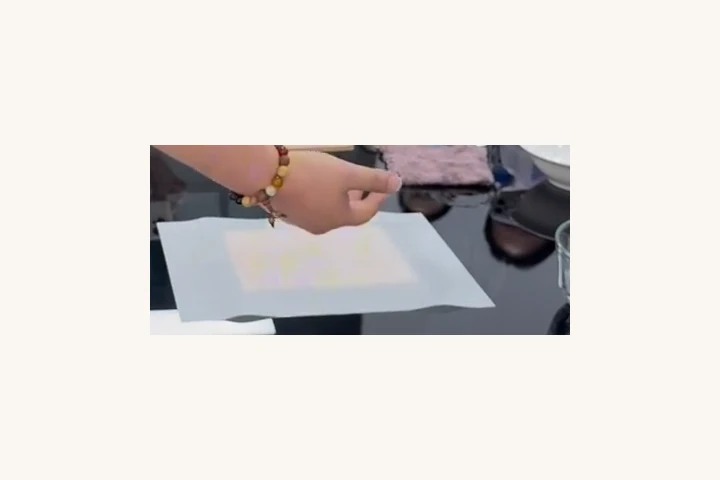
Prepare several sheets before inking. In this demonstration, the thin xuan is dampened and one edge is held by the printing apparatus. Keep a separate dry backing sheet ready for rubbing. The printing sheet receives the image; the backing sheet sits above it, taking abrasion and some moisture. A transparent registration film used in the apparatus is another item altogether and is moved aside before rubbing.
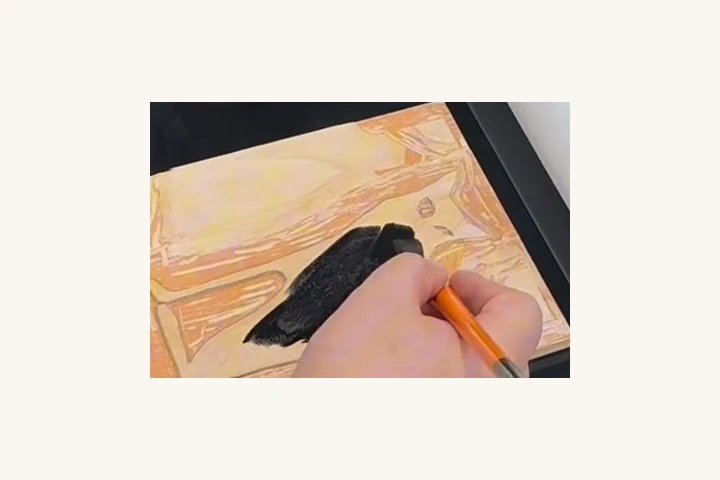
Brush the black ink over the raised body and work toward the pointed head and tail. Look across the surface as you work: the retained shape should carry ink without standing puddles in its openings. Lower areas can catch some ink without necessarily printing, but a pool that bridges a narrow gap makes it harder to keep that gap clean. Start with the ink preparation recommended for your brush-printing method and adjust from a proof rather than an invented dilution ratio.
Lower the printing sheet and rub through a dry backing
Set up the sheet holder according to its instructions before the inked block is in place. In the photographed apparatus, the fixed edge is on the right. Bring the free edge across toward the left so the sheet settles onto the block without a sideways slide. Keep the paper in that position while printing. The diagram shows the movement; the photograph that follows shows the sheet already in contact.
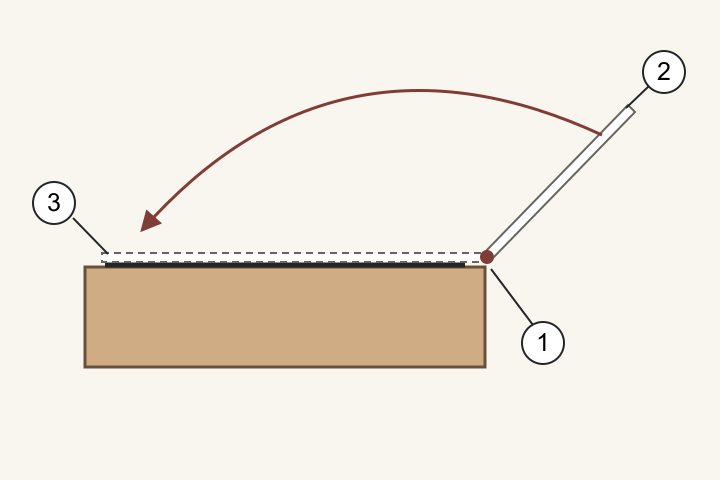
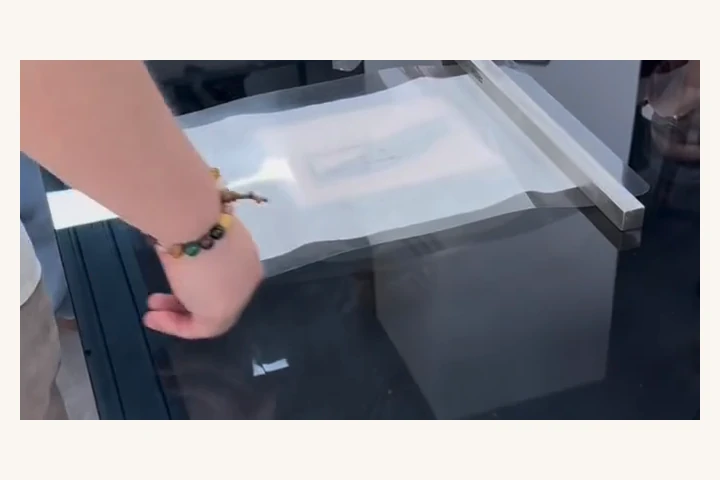
Once the transparent film is out of the way, lay the clean dry backing over the printing sheet so it covers the area you will rub. Hold the baren’s handle and use its flat base through the backing, following the inked shape in overlapping passes. Begin with enough contact to transfer the image and work across its body, head, and tail rather than bearing down on one spot. Stop if the printing sheet wrinkles or begins to tear.
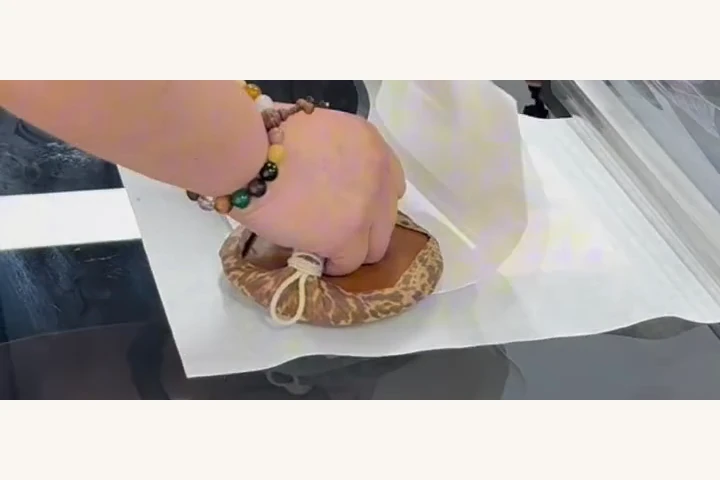
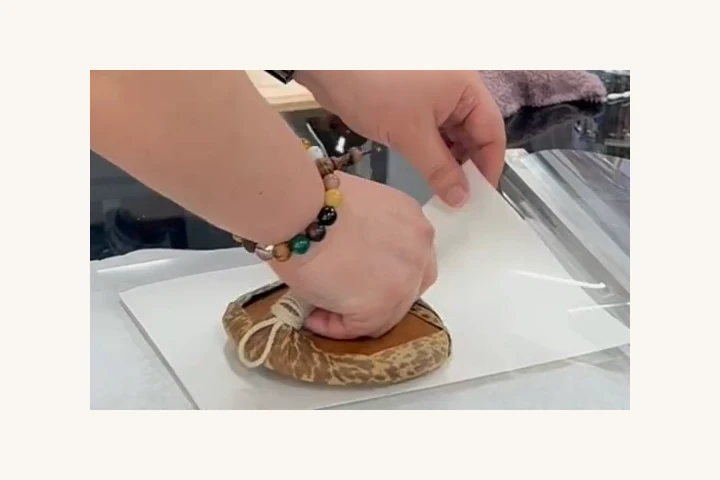
Remove the backing, then reveal the printed face
Lift away the backing first. The gray animal you can now see through the thin sheet is still a view from the paper’s back, with the printing face against the block. Support the sheet as you lift its free edge, peel it clear without dragging it over the wood, and turn it so you can inspect the printed face. If the paper catches, pause and release that area gently rather than pulling harder.
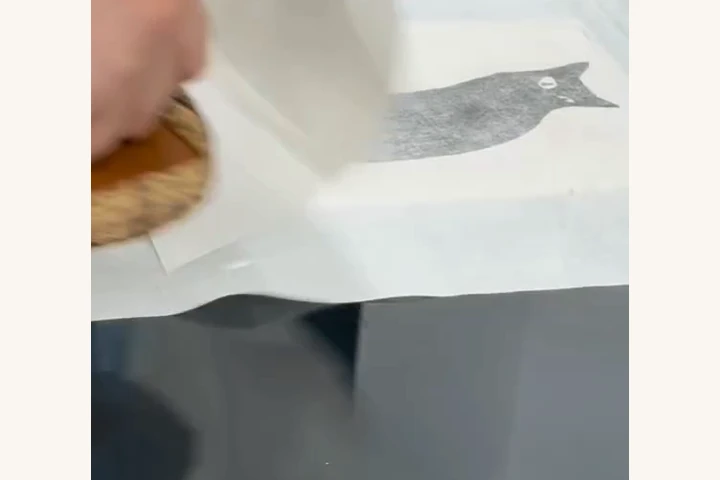
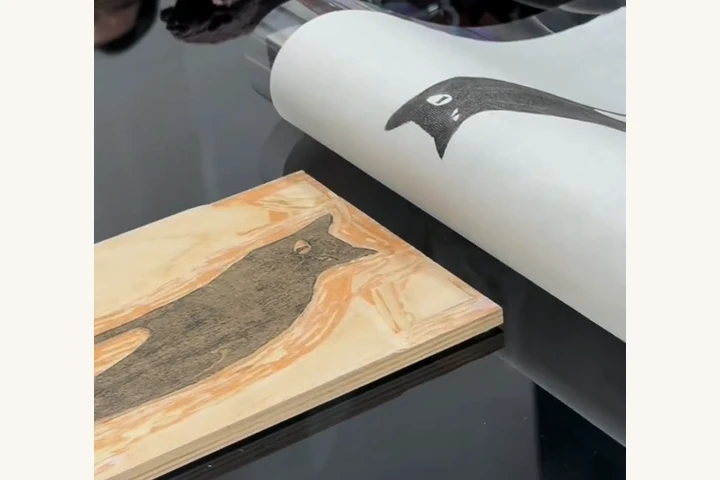
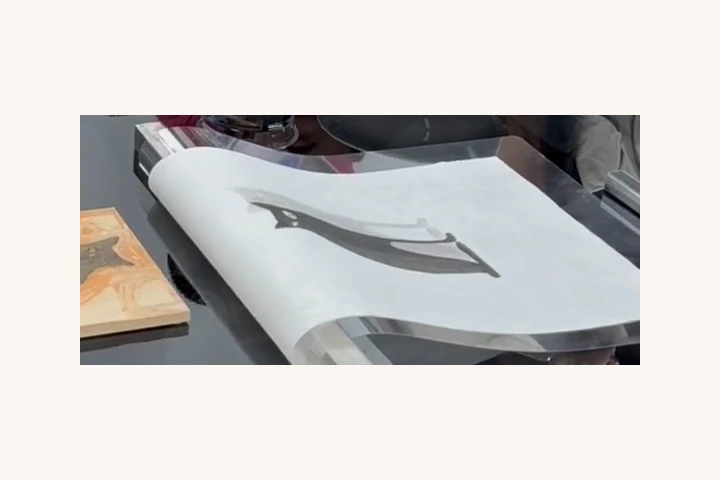
Read the image by matching features, not by chasing an even solid black. Can you see the head points, the round white eye, and the opening beside the tail? Wood grain and brush marks can remain visible in water-based printing. A pale area is a reason to inspect ink coverage and contact, rather than proof that the block needs immediate recarving.
Sources: CAFA · Yang Pengcheng on teaching water-based woodcut
Choose one change for the next proof
Keep the first proof and mark its order in a clean margin. Before diagnosing a difference, compare the same head, eye, and tail gap in similar light and at the same paper condition, such as after both sheets have dried. Yang’s teaching account emphasizes retaining trial prints and recording the conditions. For a beginner repeat, use fresh paper and change one condition at a time; the sequence below is an editorial troubleshooting method, not a controlled experiment performed in the photographs.
Sources: CAFA · Yang Pengcheng on teaching water-based woodcut
| What you see | Check in this order | When to try again |
|---|---|---|
| A doubled outline | Compare one edge, then check whether the printing sheet slipped or was lowered twice in different positions. | Reset the sheet holder and make a fresh proof before cutting any wood. |
| Dark marks inside a planned white gap | Find the matching place on the block. Brush off loose debris; check for an isolated high spot and ink pooling. | After cleaning and re-inking, make a fresh proof: continue if the intended gap prints clear. Remove wood only when a visible unwanted high point is confirmed, with the block secured and knife work complete before re-inking. |
| A weak or patchy part of the animal | Compare the same area; check its ink coverage, then whether paper contacted it and whether that area received a rubbing pass. Finally check paper and ink preparation against their instructions. | On fresh paper, change only the first condition you have confirmed needs correction. If the same spot stays pale despite consistent inking and contact, inspect block flatness before further cutting. |
| Wrinkles, scuffed fibers, or a tear | Stop rubbing. Check paper movement, excess moisture, backing coverage, and whether pressure was concentrated at one point. | Use an intact sheet with the preparation corrected. A torn proof cannot establish whether extra pressure would have helped. |
Record which area you changed, what you changed, and what appeared on the next sheet. A useful first result has a recognizable outline, an open eye and tail gap, and the intended direction on the printed face. When those three features hold together, you have connected carving, inking, paper contact, and pressure on one block—and have a specific observation to guide your next print.
Continue reading
BeenEast’s beginner sequence follows selected stages of one recorded classroom demonstration. The photographs are actual video frames; the three labeled diagrams are original explanations. Workholding, waste-margin testing, and the one-change troubleshooting sequence are beginner adaptations. The full print shown received an additional local pass. The exact wood, ink product, and moisture measurements were not established; no starter kit or reproduction of this lesson has been physically tested by BeenEast.
References
CAFA · Yang Pengcheng on teaching water-based woodcut
Flexcut · Workholding for beginning carvers