

How separate embroidered petals form a three-dimensional flower
max ·
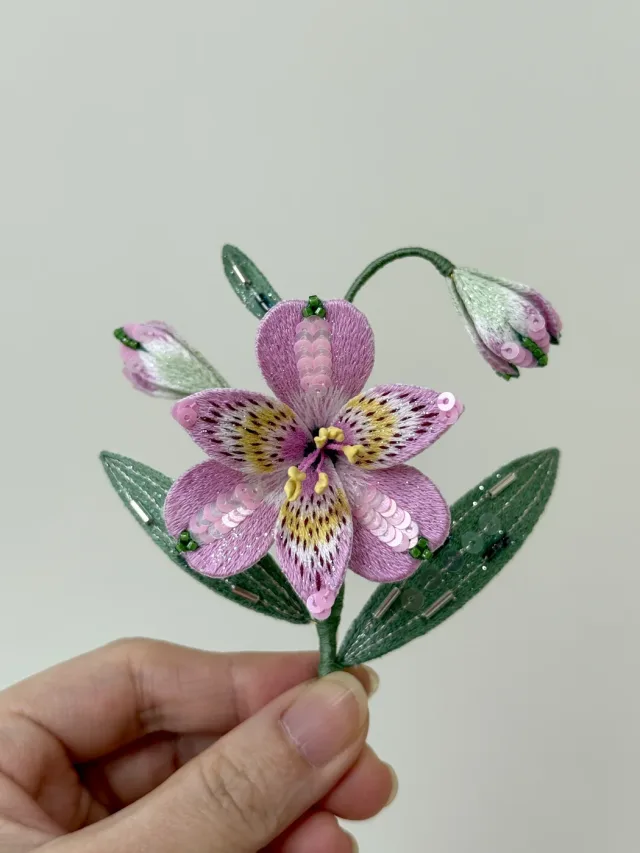
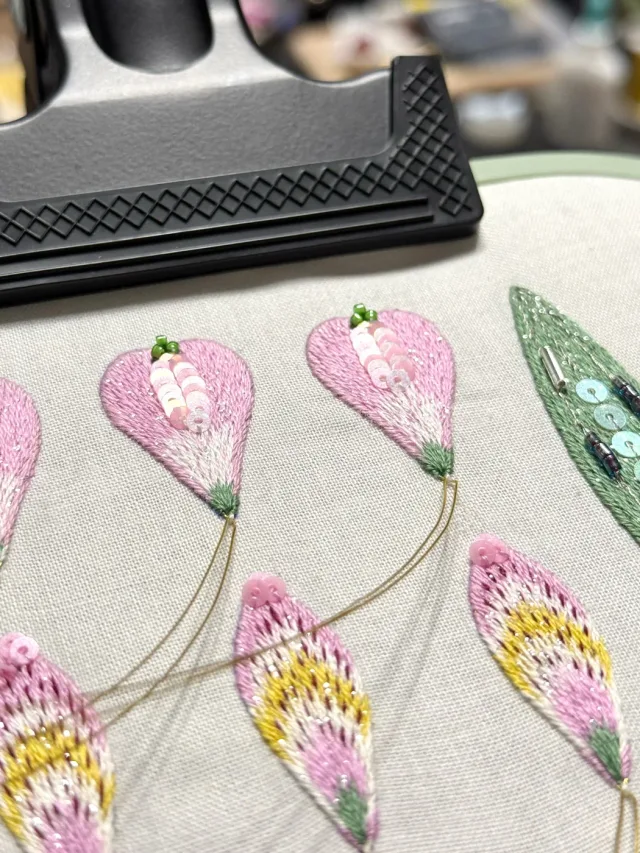
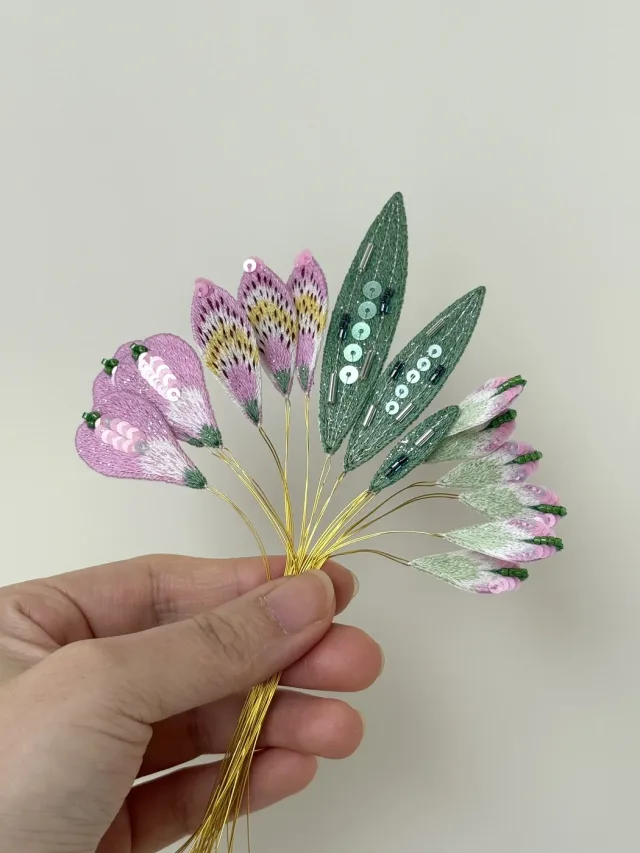
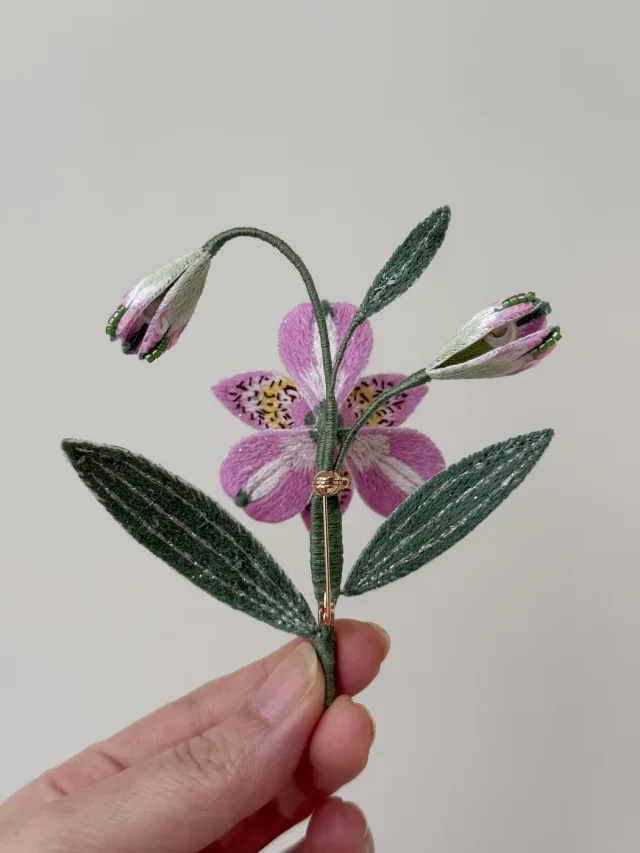
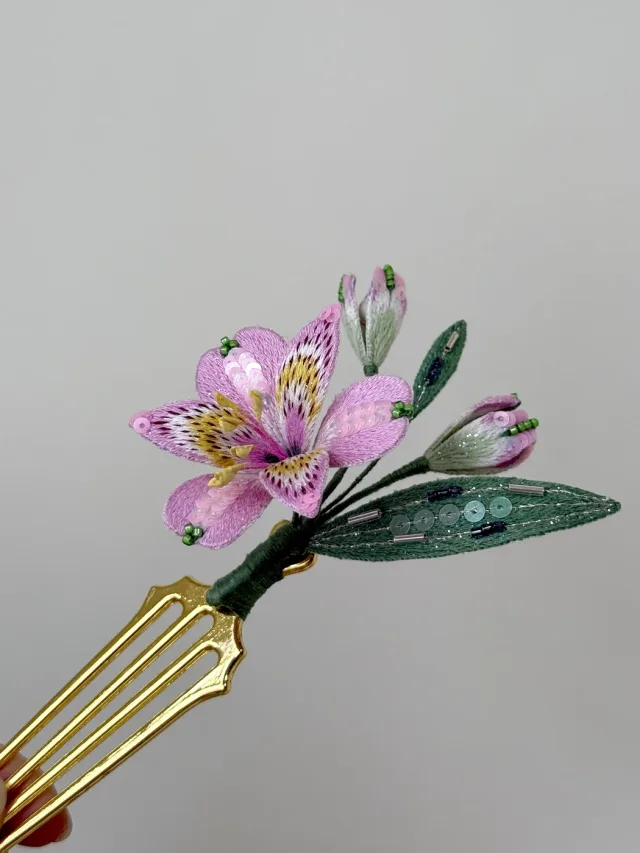
The petals of this embroidered flower get their depth from how the separate pieces are arranged. The pointed petals project around the center, while broader pink petals sit behind them. The maker shows the pieces apart and then assembled, so you can see where that depth comes from.
Look at the petals before assembly
On the work surface, each petal has its own outline and thin wire tails. The broad petals carry a row of sequins, while the narrower ones have yellow, cream, and dark stitches. In the photo of the pieces held together, the wires fan out from the hand and the pieces can point in different directions.
Find the joins from behind
Turn to the back of the finished flower and follow the green stems. The two buds branch away from the main stem, and the open petals meet around the center. From the front you see the layered bloom, while the back shows where the pieces come together.
Read the layers from the side
The side view on the hair accessory makes the angles especially clear. Look for the small gaps between the pointed petals and the broader ones behind them. When you look at another raised embroidery flower, compare the front and side. The front shows which shapes overlap, and the side shows how far they lift away from each other.
 Embroidery
Inspiration and guides on embroidery.
Explore Embroidery