

How to Dye a Pale Line with Indigo Stitch Resist
Sew one row of running stitches, pull it into gathers, and dye a cotton swatch with indigo to reveal a pale line or row of dashes.
By BeenEast Editorial · Published · Reviewed
Start with one line on cotton
To make a pale line with indigo, sew one row of running stitches through cotton, draw the row into tight pleats, and dye it while the pleats are held closed. The thread pulls layers together, limiting how much dye reaches the compressed areas. When you open the cloth, those areas can show as a pale line or a row of short marks.
Sources: University of Rhode Island — A stitched-resist kimono
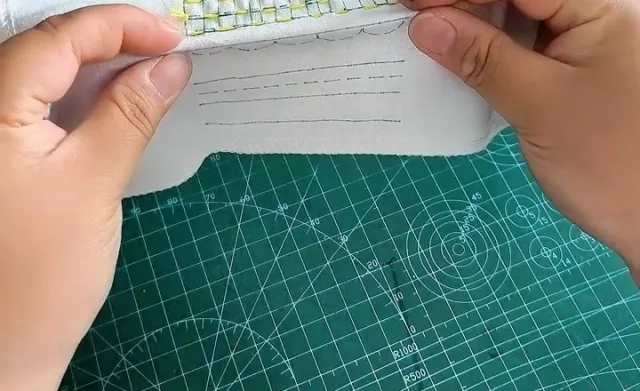
Start with a small piece of plain, prewashed cotton, a needle, sturdy sewing thread, and small scissors. The photos follow a Chinese demonstration with several stitched rows. Use one straight row on your first swatch so you can trace it after dyeing. In Japanese shibori, stitched resist methods are known as nui shibori.
Sources: University of Rhode Island — A stitched-resist kimono
Sew one row of running stitches
Draw a straight line across the middle of the flat cotton. Leave a loose starting tail, A. Work from left to right along the line: at 1, push the needle from the face of the cloth to the back; at 2, bring it back to the face a short distance ahead. Repeat through the same single layer, keeping the stitches and gaps roughly even.
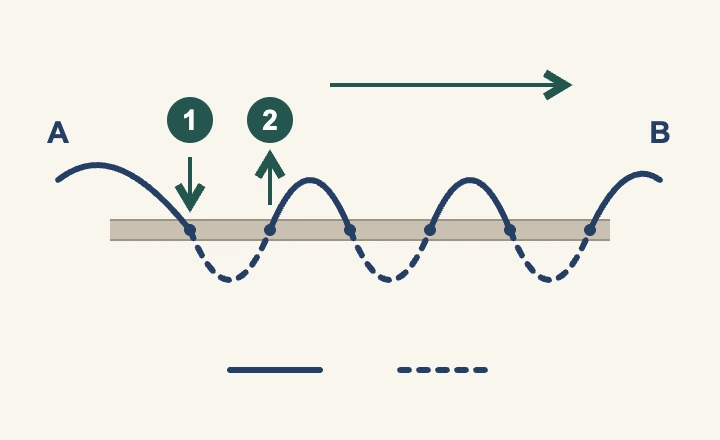
The diagram shows the cloth from the side. Solid thread lies on the face; dashed thread passes behind it. The loops are enlarged so you can follow the path—pull each stitch gently until it rests against the cloth, keeping the fabric flat for now. Finish with the needle on the face, slip it off the thread, and leave tail B long enough to grasp and tie. Keep both tails free until you gather the row.
Pull the thread and secure the pleats
Pinch the cloth beside the last stitch with one hand. With the other, pull the free tail away from the cloth while easing the fabric back along the stitched line. Keep hold of the opposite tail so it stays in the row.
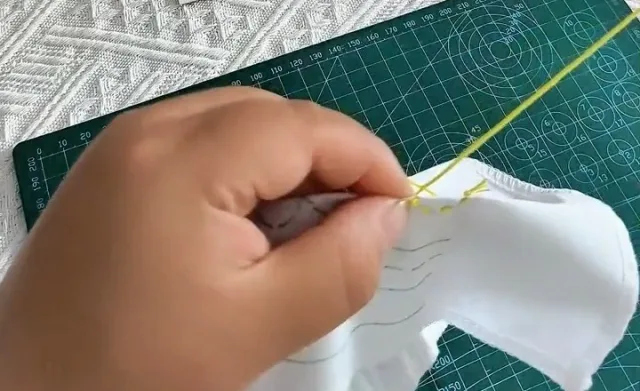
Stop when the folds along the row sit snugly together. Tie the two tails close to the gathered cloth, then lift the swatch by the fabric. If the row opens, snug the gathers again and retie before dyeing.
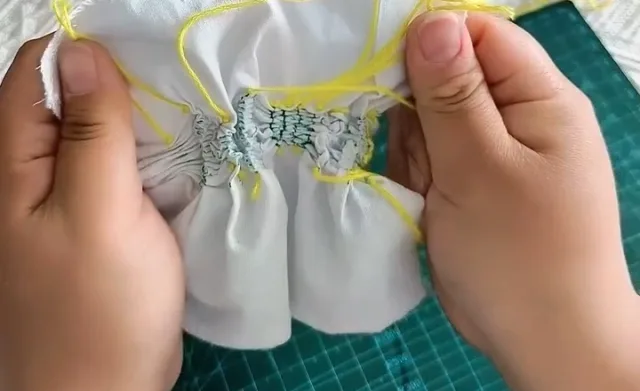
Dip the gathered cloth and let it turn blue
Leave the thread tied. Wet the gathered cloth as your indigo method directs, wear the specified protection, and lower the swatch into the prepared vat. Follow your kit or vat instructions for dipping and for exposing the cloth to air. The exposed fabric turns blue as the dye oxidizes. Keep the gathers tied through any additional dips.
Sources: Jacquard — Indigo kit quick start
Lift the thread before cutting
Follow your dye directions for the finishing order. The Jacquard quick-start sheet calls for rinsing, untying, and washing after the final dip and air exposure. At the untying stage, use the tip of a blunt needle to lift a visible stitch away from the fabric. Snip the raised thread, ease it out, and open the pleats.
Sources: Jacquard — Indigo kit quick start
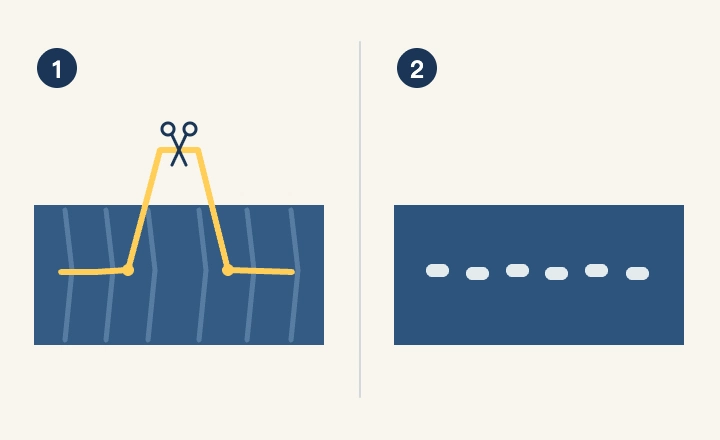
After washing and drying, follow the original stitch path across the swatch. Look for where pale marks meet and where blue separates them. For a second swatch, change the stitch spacing while keeping the fabric, gathering tension, and dye sequence as similar as possible. Compare the dry rows under the same light.
Continue reading
Reuse and citation
English PDF and Markdown contain the text; their photo links open the illustrated guide.
BeenEast Editorial. How to Dye a Pale Line with Indigo Stitch Resist. Version 1.0 (2026-11-13). https://community.beeneast.com/guides/hand-dyeing-indigo-stitch-resist
References
University of Rhode Island — A stitched-resist kimono