

How tiny knots give embroidered flowers texture
max ·
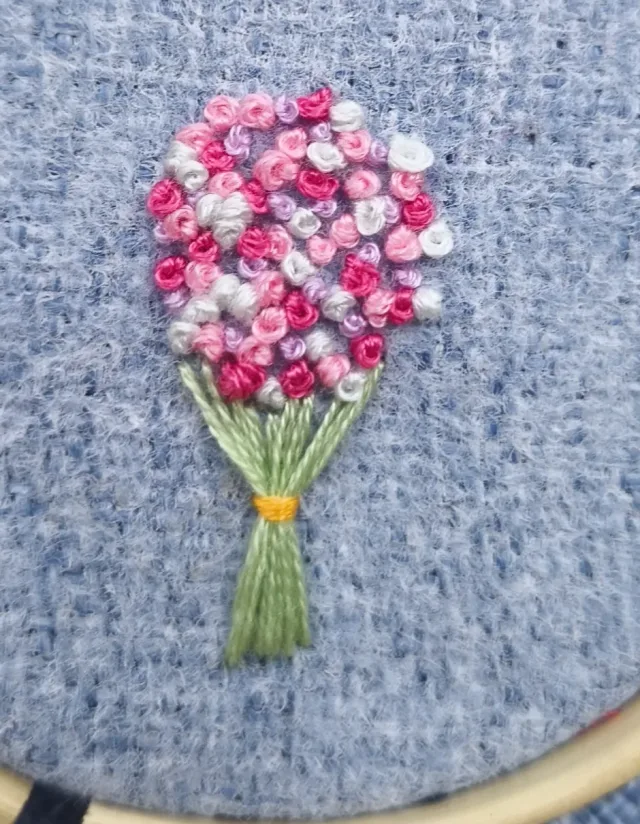
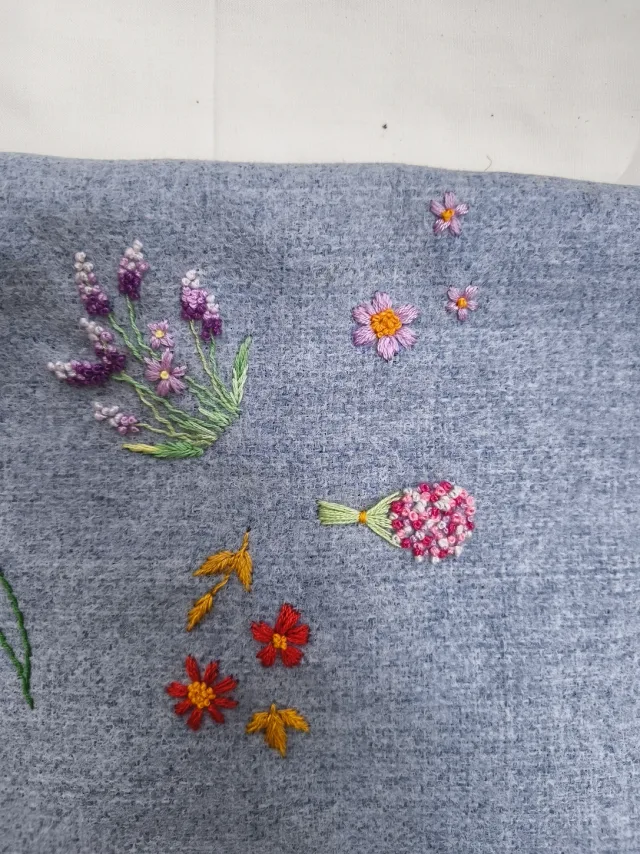
Tiny knots sit above the cloth, so a group of them gives a flower a bumpy surface. In the pink and white bouquet, each curled dot is visible around the edge of the flower head. The longer green stitches below it make a smooth bundle of stems. The change in texture helps you read the two parts.
See where a knot sits
The maker describes this as knotted-stitch practice. A French knot is one way to make a raised dot. The thread is wrapped around the needle and drawn down into a small knot at the cloth’s surface. Look at the larger pink flower on the practice cloth. A few yellow knots fill its center, while longer pink stitches spread outward as petals. Along the purple stems, the knots become the flower heads themselves.
Compare a center with its petals
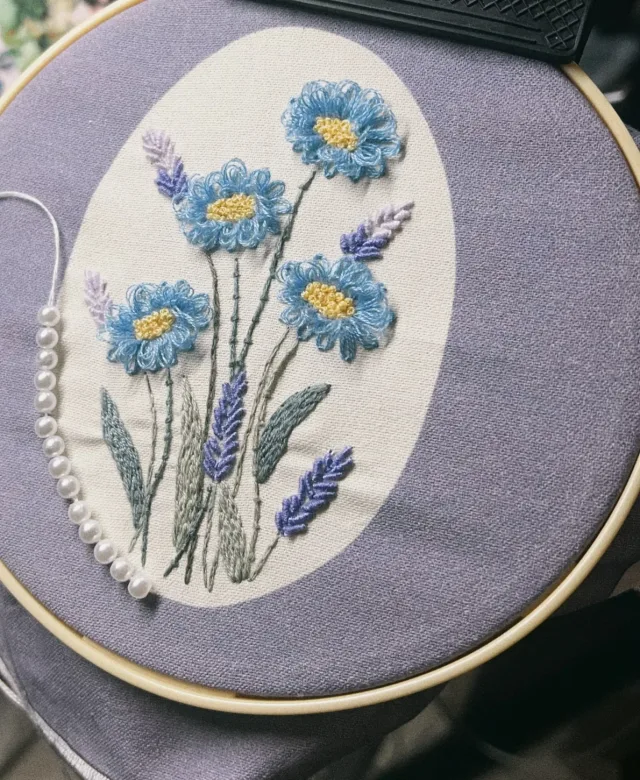
The blue flowers are by a different maker. Their yellow centers form compact clusters, surrounded by open blue petal loops. In this close view, you can follow an individual loop in a petal, then compare it with the small rounded marks packed into the center. Those two surfaces give the flower a distinct middle and edge.
Look for a change in texture
When you look at a small embroidered flower, start with the boundary between its center and petals. Notice where raised dots gather and where longer stitches begin. A handful of knots can suggest a seed-filled center. Gathered across a larger area, they can suggest a whole flower head.
 Embroidery
Inspiration and guides on embroidery.
Explore Embroidery