

How Should I Learn Cloisonné? Start with a Small Fired Sample
Make a two-cell fired sample with an instructor, and use the cooled glass to decide what to practice next.
By BeenEast Editorial · Published · Reviewed
Start with a flat two-cell sample
For a first lesson, make a small, flat sample with two roomy cells in a teaching studio. Use a single divider that meets the outer frame at both ends. On a flat base, you can see whether the joins close, keep the colors in separate cells, and compare the cooled enamel with the wire tops. Have the instructor set the material and firing method and supervise kiln work.
Sources: Pocosin Arts · Introduction to Cloisonné Enameling
A 2025 report from Beijing’s Dongcheng District describes visitors at the Beijing Enamel Factory choosing a prepared pattern and placing enamel with a technician’s guidance. That exercise teaches you to fill the cells evenly. The report says purchased pieces could be fired before visitors took them home, with no details on visitors handling the kiln or refilling after cooling. Use the example to identify what a lesson includes.
Sources: Beijing Dongcheng District Government · A visit to the Beijing Enamel Factory
Know what each layer and tool does
The metal is the support. The base coat is the first fired layer on the front and can anchor the wire in this method. Some setups also use counter enamel, a glass coating on the back that helps balance stress. The upright wire makes the walls, and the damp glass grains add color inside them. Ask the instructor to point out these layers on a sample before you begin.
Sources: Pocosin Arts · Introduction to Cloisonné Enameling
Pliers bend the wire. Tweezers place it. A brush tip or small applicator carries damp grains into the cells. Follow the studio’s instructions for handling dry enamel powder, working at the kiln, and cleaning up after grinding.
Sources: Pocosin Arts · Introduction to Cloisonné Enameling · Guild of Enamellers · Guide to Health and Safety
Check the fired base before adding wire
For the base-coat method, check the cooled sample with the instructor before laying out the wire. Look across the surface under good light. The base coat should cover the intended area, and the blank should still sit flat enough for the design. If you find bare spots, a crack, or a base that rocks on the bench, stop and check the preparation with the instructor before covering it.
Sources: Pocosin Arts · Introduction to Cloisonné Enameling · Thompson Enamel · Enameling Help and Information
Use the studio’s matched metal and enamel. The same color name does not tell you whether a glass enamel fits another metal or firing schedule.
Bend, place, and secure the divider
Stand the strip on its narrow edge and place it between the two cells. Check both ends where it meets the outer frame. If an end leaves a gap or the strip rocks, adjust the fit with the instructor before fixing it in place.
Sources: Pocosin Arts · Introduction to Cloisonné Enameling
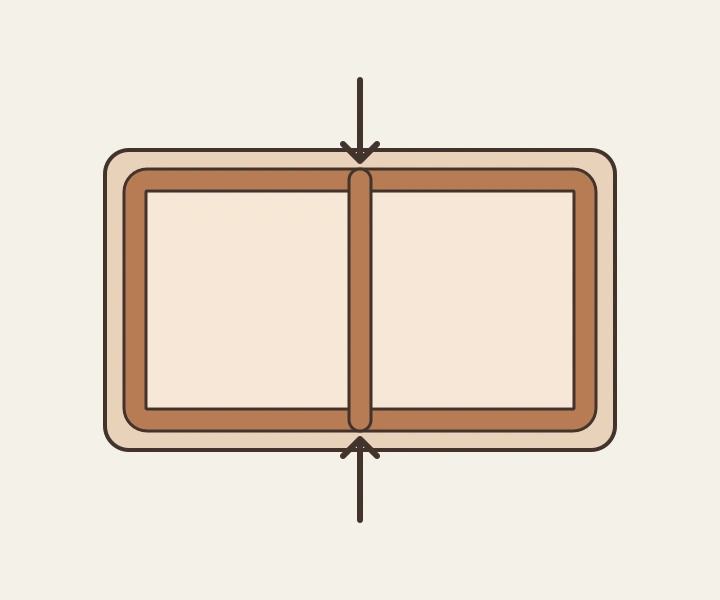
In the base-coat method, the instructor guides the firing that secures the wire. After cooling, compare the two joins with the layout you placed. If either end has shifted, review the attachment before adding enamel.
Sources: Woodrow W. Carpenter · Intro to Enameling: Cloisonné Pendant
Pack damp enamel to the inside edge
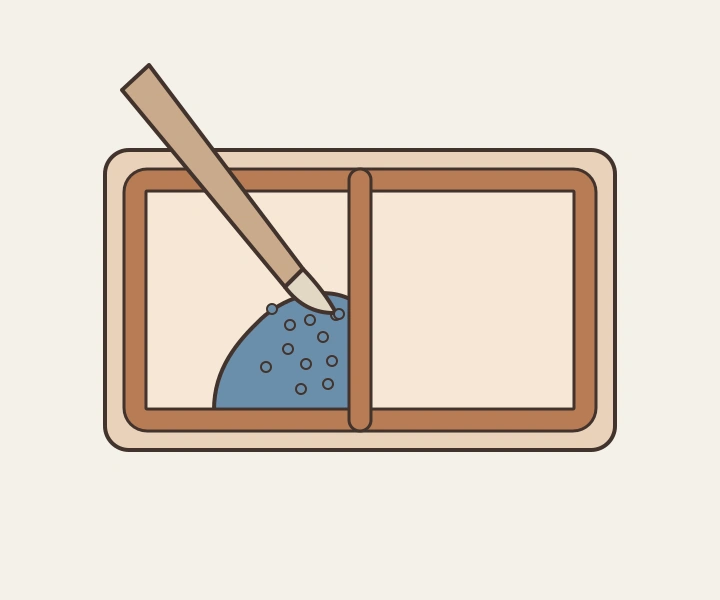
Carry a small amount of damp enamel on the brush tip and place it inside one cell. Work toward the inner edge until no bare strip shows beside the wall. If grains collect at one end or colored water crosses the divider, pause and ask the instructor to check the water and placement before filling the next cell. Let the sample dry as directed before firing.
Sources: Woodrow W. Carpenter · Intro to Enameling: Cloisonné Pendant
Compare the two cells after cooling
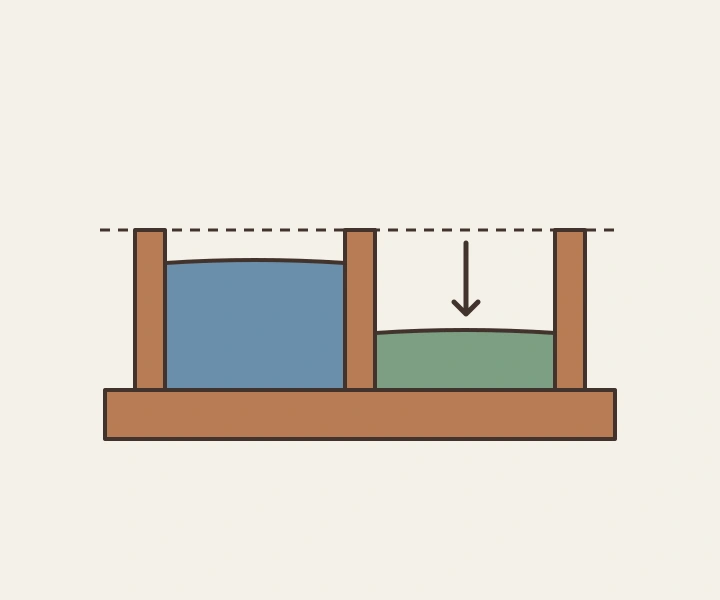
With the sample cool, tilt it under a light and use the tops of the wires as your reference. If the glass in one cell is intact and sits too low for the intended finish, mark that cell on a sketch and have the instructor confirm where to refill. If you see a crack, a missing patch, or a moved divider, stop before adding another layer. First check the location on the cooled sample, then review the previous filling or attachment step and the studio’s material and firing records with the instructor.
Sources: The Metropolitan Museum of Art · Chinese Cloisonné · Thompson Enamel · Enameling Help and Information
Keep the sample and choose what to practice next
If the lesson includes grinding, compare your sample with the instructor’s reference before removing material. Keep the cooled sample and a sketch labeled with the metal, base coat, colors, and the cell you refilled. On your next sample, repeat the same layout and change one thing you want to study. For example, keep the materials the same and focus on getting the damp grains all the way to the edges before firing.
Sources: Pocosin Arts · Introduction to Cloisonné Enameling
Before booking, use the studio’s current contact page to ask which steps are hands-on and whether you can see the sample after cooling. A prepared pattern gives you time to practice filling. A lesson that lets you place wire, compare a cooled sample, and refill teaches more of the sequence. Confirm the teaching language and whether the sample can be collected after firing.
English booking message (replace [date] with your visit date)
I’d like to learn fired-glass cloisonné on [date]. Which steps will I do myself: bending and securing the wire, filling the cells, or checking the cooled sample and refilling? Who handles the kiln, and when can I collect the sample?
Continue reading
References
Pocosin Arts · Introduction to Cloisonné Enameling
Beijing Dongcheng District Government · A visit to the Beijing Enamel Factory
Guild of Enamellers · Guide to Health and Safety
Thompson Enamel · Enameling Help and Information
Woodrow W. Carpenter · Intro to Enameling: Cloisonné Pendant