

How to Tie an Indigo Resist Knot in Cotton
Tie one knot in folded cotton, then follow the pale mark it leaves after indigo dyeing, washing, and drying.
By BeenEast Editorial · Published · Reviewed
How a knot keeps cloth pale
Fold a strip of lightweight cotton and tie one overhand knot in the cloth itself. The knot squeezes the folded layers together, so less dye reaches the inside than the exposed cloth. That is the resist: when you open the strip, the compressed area can show a pale patch with a blue edge.
Sources: Museum of Fine Arts, Boston — How folds and ties resist dye
Start with prewashed, light-colored cotton long enough to leave two ends you can grip. The photos follow one cloth from a Chinese dyeing demonstration. The maker tied several knots, so use the photos to see how the cloth is handled and start your own test with one knot.
Fold a strip and tie one knot
Fold the cloth lengthwise into a strip. Cross the ends near the middle, pass one end through the loop, then pull both ends until the knot holds the folded layers together. Leave enough cloth on each side to grip later. Photograph the knot with both ends in view so you can find its position after unfolding.
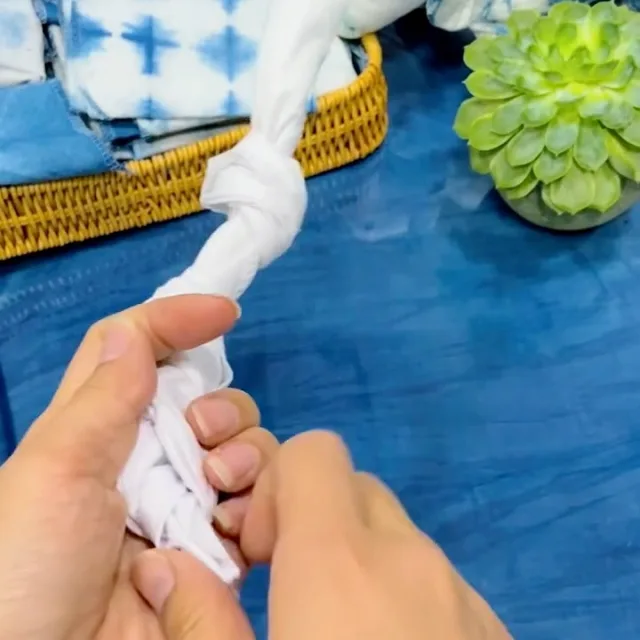
Keep the knot tied through dyeing
With the knot in place, wet the sample as directed for your indigo vat. Wear the protection specified for that product and lower the cloth gently into the prepared bath. Follow the directions for the dip and the time the cloth needs in air. If you repeat the dip to deepen the blue, leave the knot tied through the additional cycle so the same folds stay compressed.
Sources: Jacquard — Indigo kit quick start
Loosen the knot and open the folds
Follow your dye directions for when to untie. The Jacquard quick-start sheet calls for rinsing, untying, and washing after the final dip and air exposure. At the untying stage, feed a little slack into the loop and ease the end back through. Then separate the folded layers and open the strip.
Sources: Jacquard — Indigo kit quick start
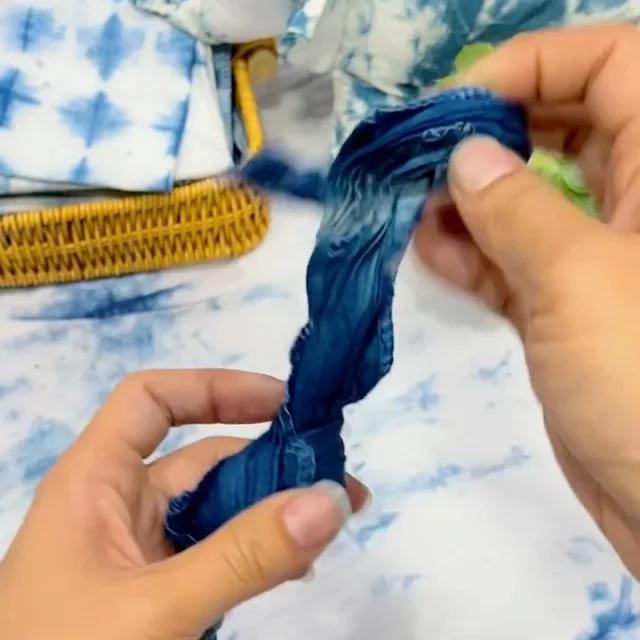
Read the pale mark on dry cloth
When the cloth opens, pale areas become visible between darker lines. In the demonstration, the cloth is still wet and several knots contributed to the pattern. On your one-knot test, finish washing and drying first, then use the photo to find the knot’s position. Compare the center of the pale area with its edge and with the exposed ends.
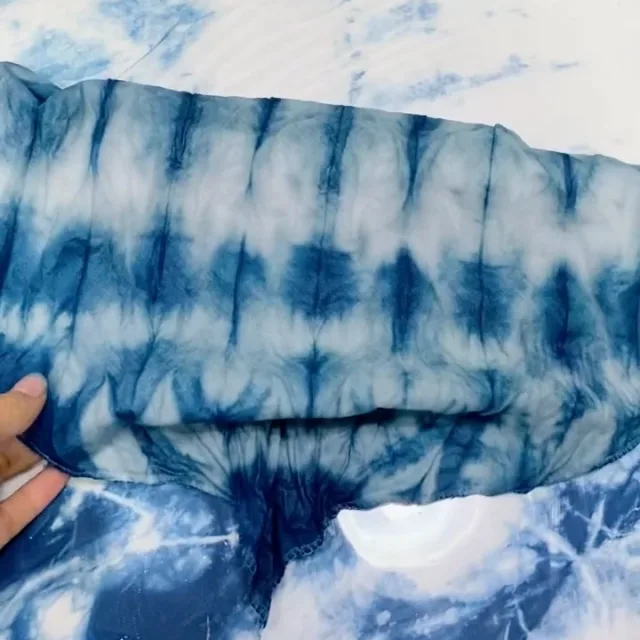
To test placement, tie a second strip from the same fabric closer to one end. Keep the fold, knot tension, and dye steps as similar as you can. Lay both dry strips under the same light and compare how far each pale mark sits from the nearest end.
Continue reading
Reuse and citation
English PDF and Markdown contain the text; their photo links open the illustrated guide.
BeenEast Editorial. How to Tie an Indigo Resist Knot in Cotton. Version 1.0 (2026-11-13). https://community.beeneast.com/guides/hand-dyeing-indigo-knot-resist
References
Museum of Fine Arts, Boston — How folds and ties resist dye